Search
How to add Mailchimp to your website
Forward form submissions directly to your Mailchimp account.
How to integrate a Mailchimp subscription form on your website
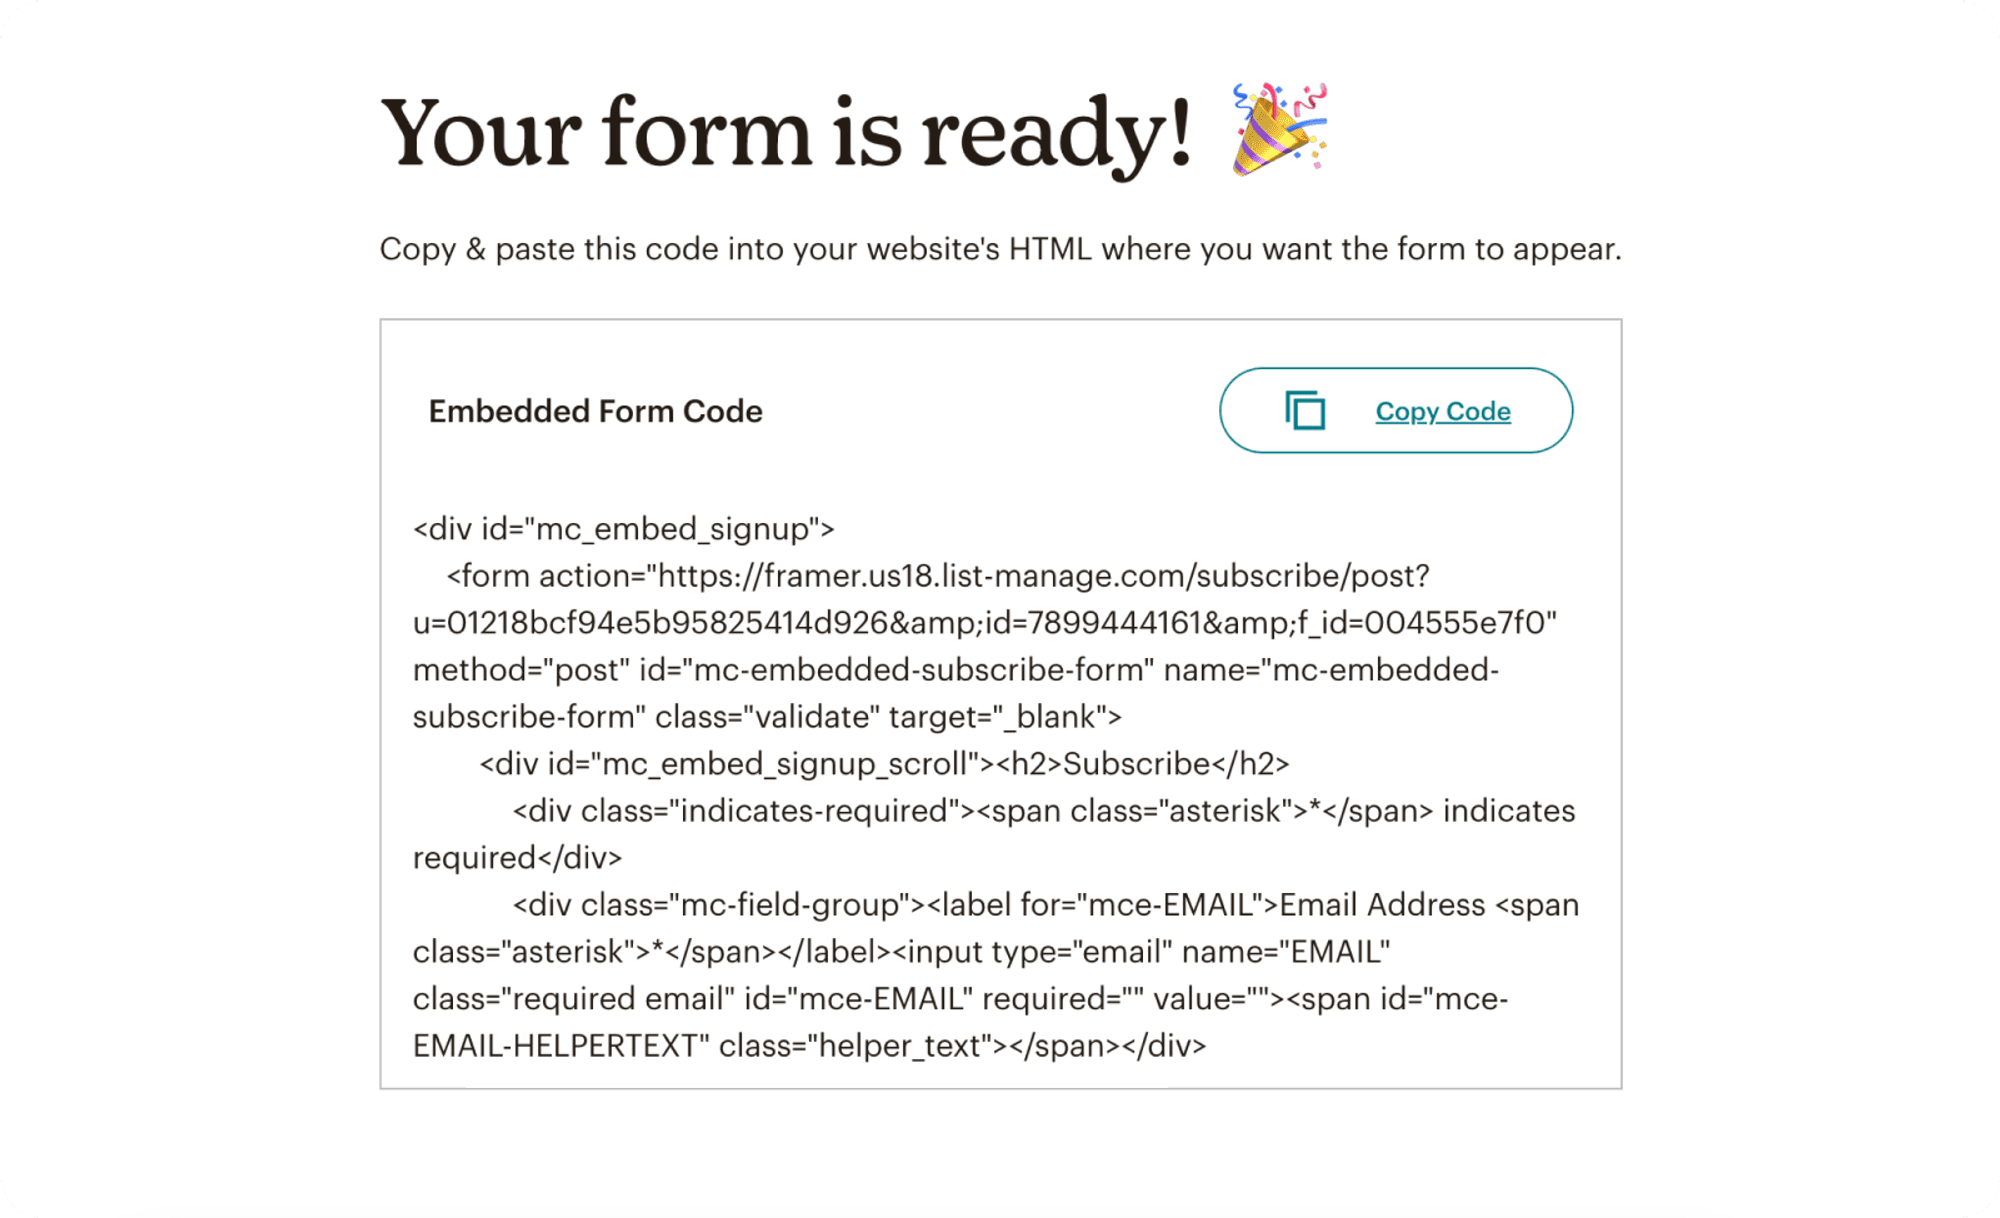
To make a new embedded form or edit an existing one in Mailchimp, access the Embedded Form Code section. Copy the form URL located within <form action="">. The URL format resembles the example below:
Where should I paste the embed code in Framer?
To paste the embed code in Framer, you have two options available.
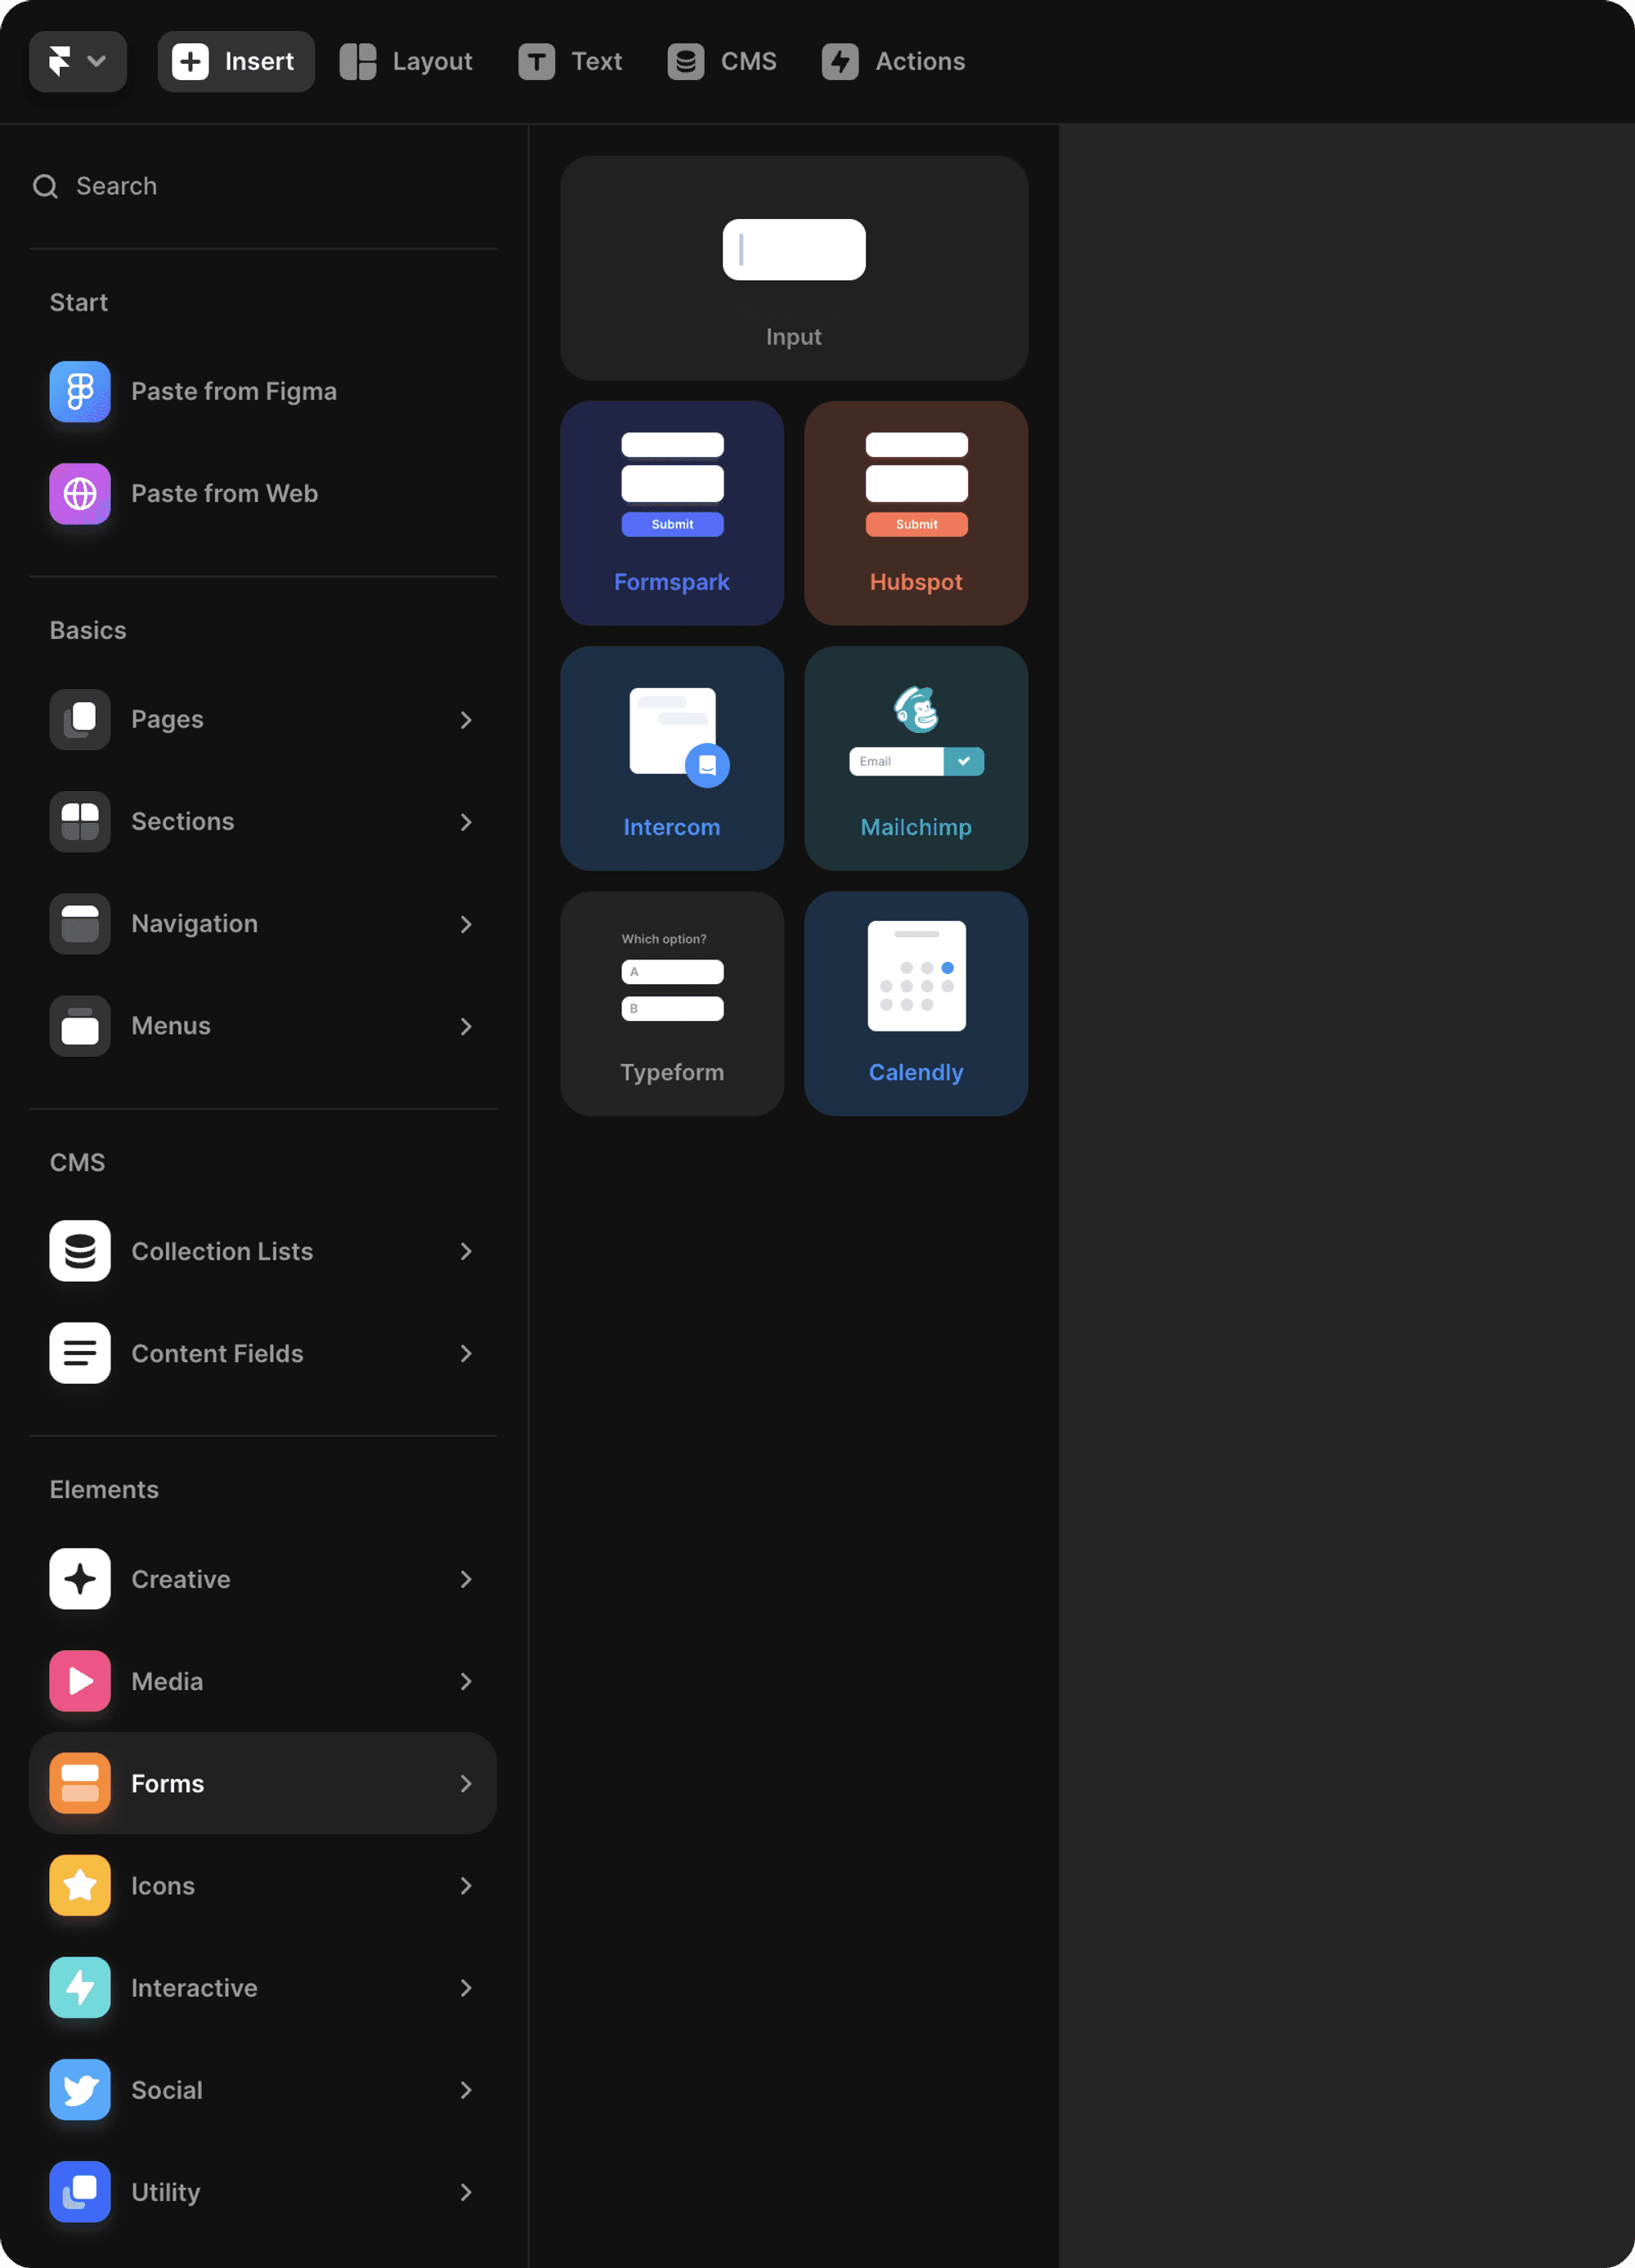
The first option is to use the Mailchimp component. If you want to choose this option, open a project in Framer. On the left side of your Framer canvas, you will find the Insert panel. Then, locate Mailchimp in the Forms section and drag the Mailchimp component, which includes an email text field and a sign-up button, onto any page on your canvas.
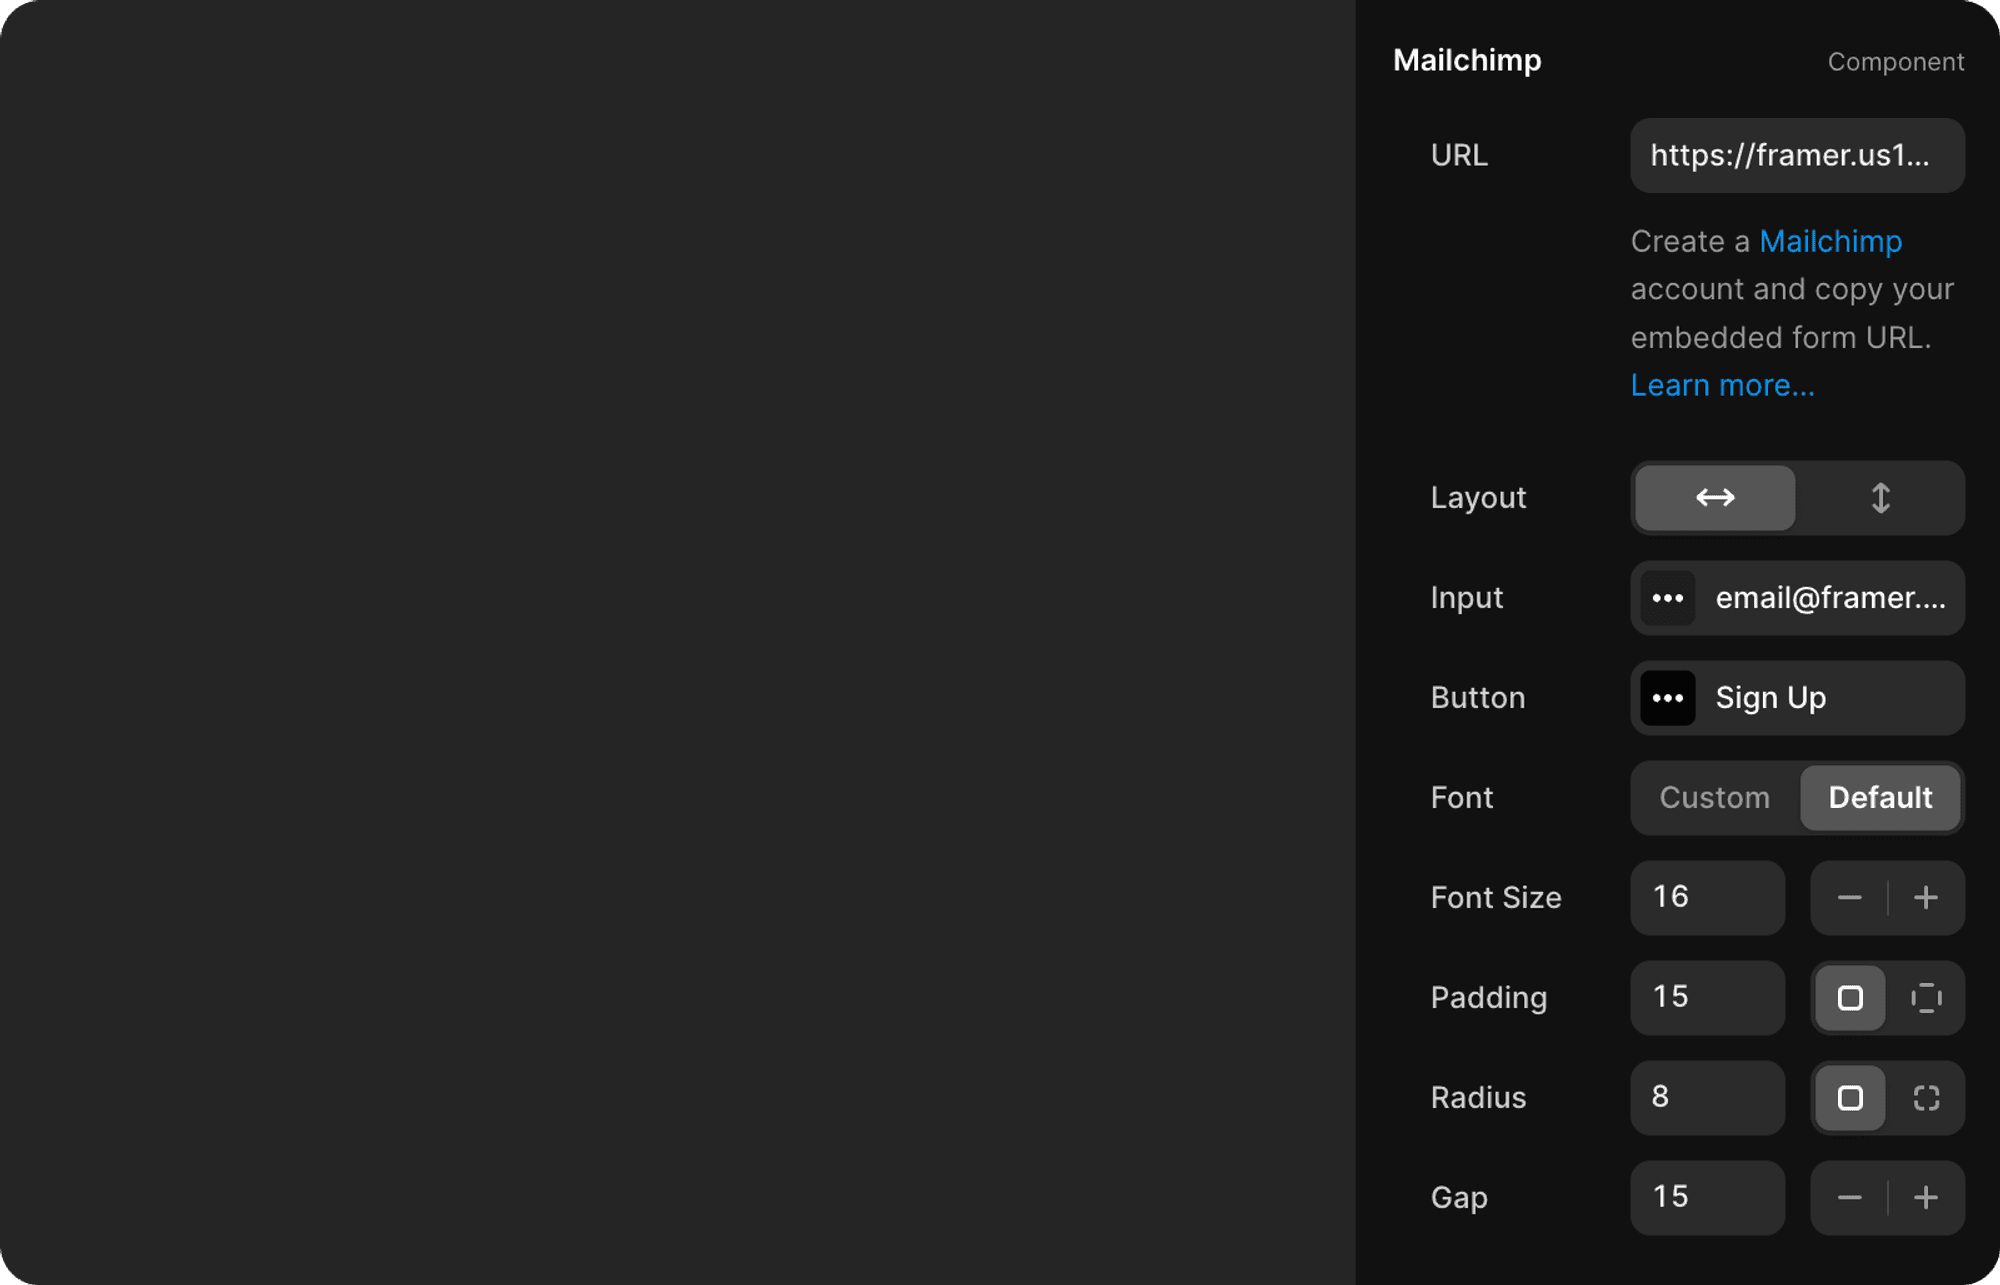
From there, you'll be able to paste the form URL into the properties panel on the right. Below the URL, you'll notice fields for input, button, and more. You can customize the appearance by changing the layout, colors, adding custom fonts, and modifying the radius.
Try previewing or publishing to test your form and see instant results.
The second option is to use the Input component. If you want to choose this option, open a project in Framer. On the left of your Framer canvas, you'll find the Insert panel. Then, find the Input component in the Forms section and drag it onto any page on your canvas.
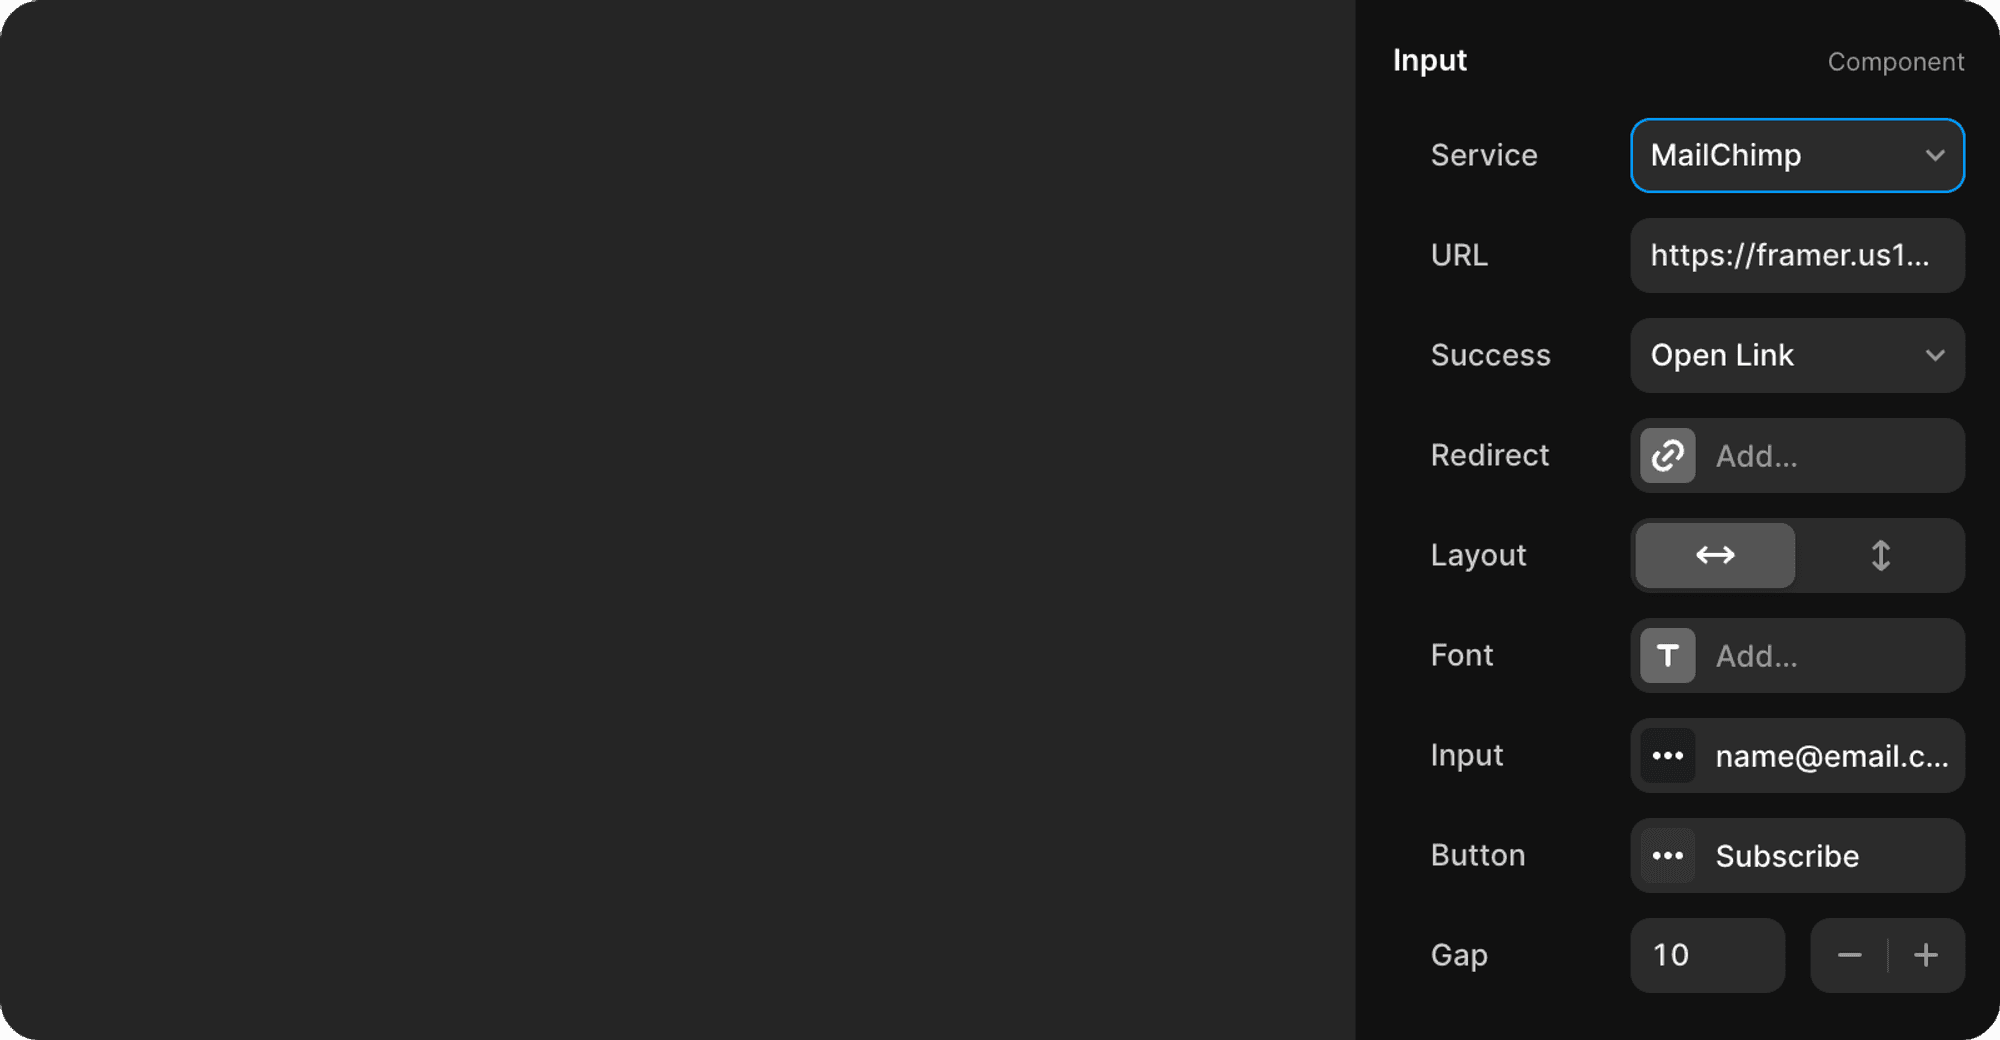
From the properties panel on the right, choose MailChimp as a service and paste your embed code. The input component allows you to choose between options when a user completes a submission. You can choose to redirect to a thank-you page or open an overlay after submission.
If you want to open a new link, simply select "Open Link" from the Success dropdown and add your link to the Redirect input.
If you want to open an overlay, select "Show Overlay" from the Success dropdown and add an overlay by clicking the "+" icon next to the Overlays section. This will automatically create a connection between the input component and the overlay. From there, you can add any content you want to show your users after a successful submission.
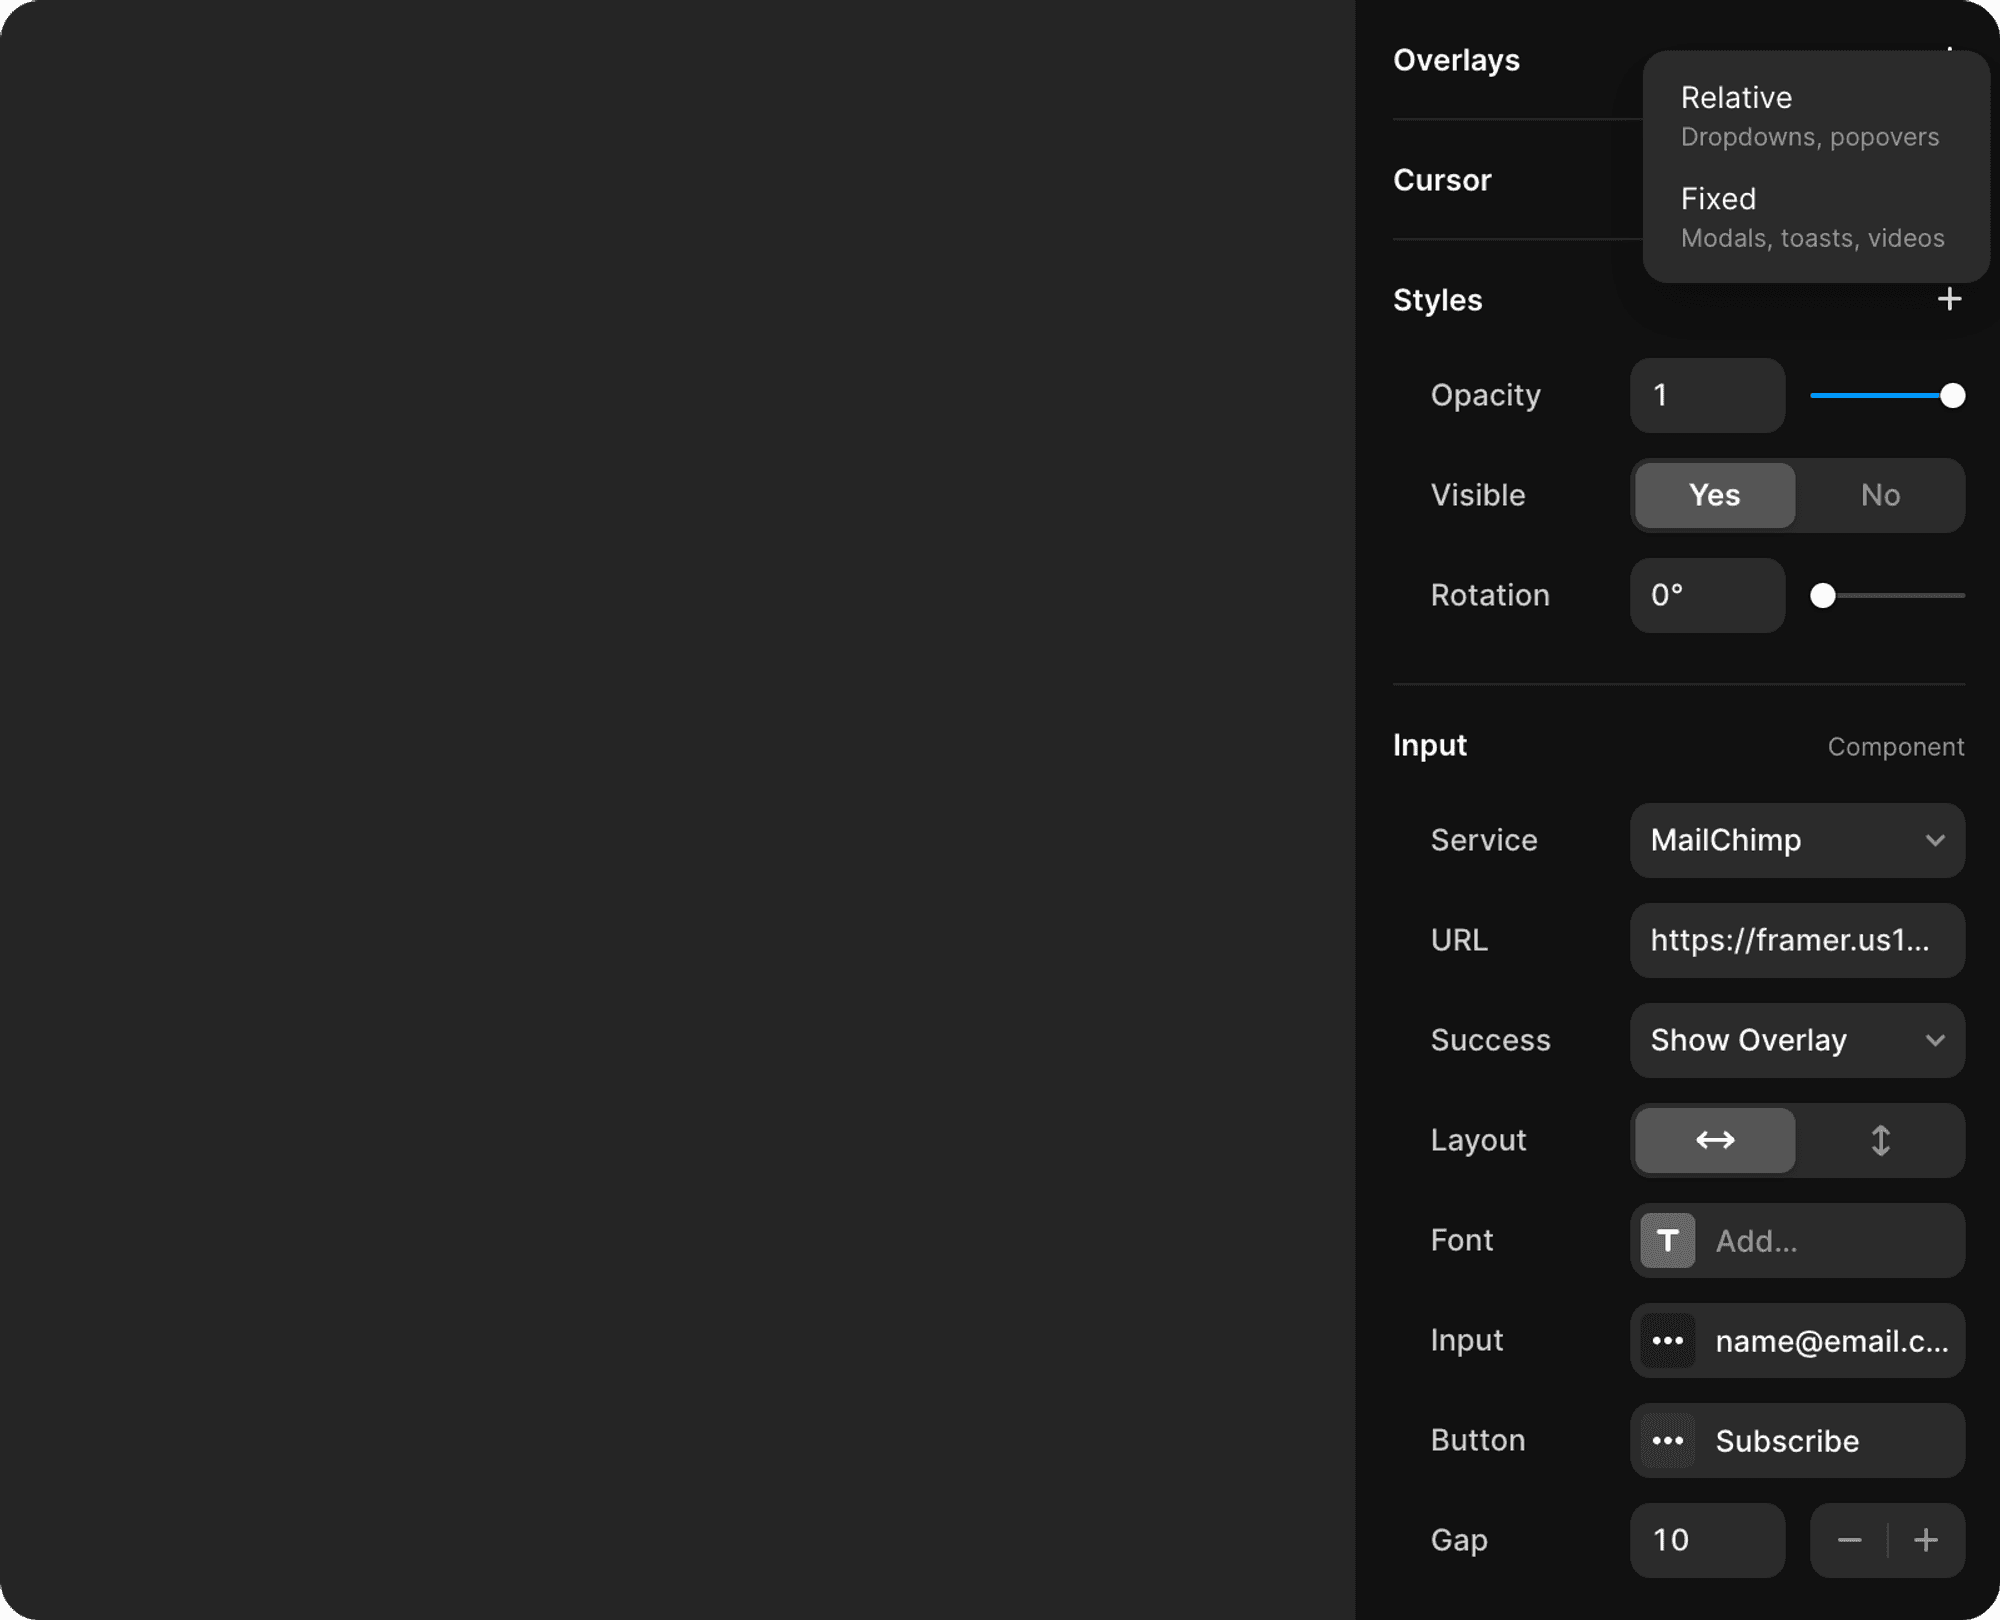
You can also customize the appearance by changing the layout, colors, adding custom fonts, and modifying the radius.
Top use cases for Mailchimp in Framer
Keep your site visitors engaged with compelling email content to encourage repeat visits. Easily expand your email subscriber list and grow your site's audience by integrating Mailchimp on a Framer site in seconds.
Provide discounts on products and services in exchange for an email address. Convert shoppers into repeat buyers by giving them a coupon code upon joining your email list.
Offer top-notch content for potential leads to provide their email for downloading a white paper or PDF. Enhance your sales funnel by utilizing follow-up emails to qualify leads effectively.
Send exclusive tips to subscribers to encourage site visitors to opt-in. Email them valuable tips and resources not available elsewhere.