How to proxy with Cloudflare
Learn how to set up Cloudflare with Framer, enabling reverse proxying for enhanced security, performance, and analytics.
What is reverse proxying?
Cloudflare acts as an additional layer between your site and its visitors, known as reverse proxying. This can provide:
Enhanced security
Improved performance and availability
Advanced analytics
Framer already includes many of these features, so reverse proxying is typically only necessary for specific requirements.
Note: Reverse proxy is available only as an Add-on in the Scale plan or with our Enterprise plans.
Initial setup
Disable proxying during setup:
Set your domain to DNS Only in Cloudflare.
This allows Framer to fetch a new SSL certificate.
Enable proxying after setup:
Once everything is working, switch to Proxied mode.
For domain configuration steps, read this guide on connecting a custom domain.
Configure your domain in Cloudflare
Go to your Cloudflare account and add your site.
Add domains as explained earlier. For root domains, Cloudflare uses “@”.
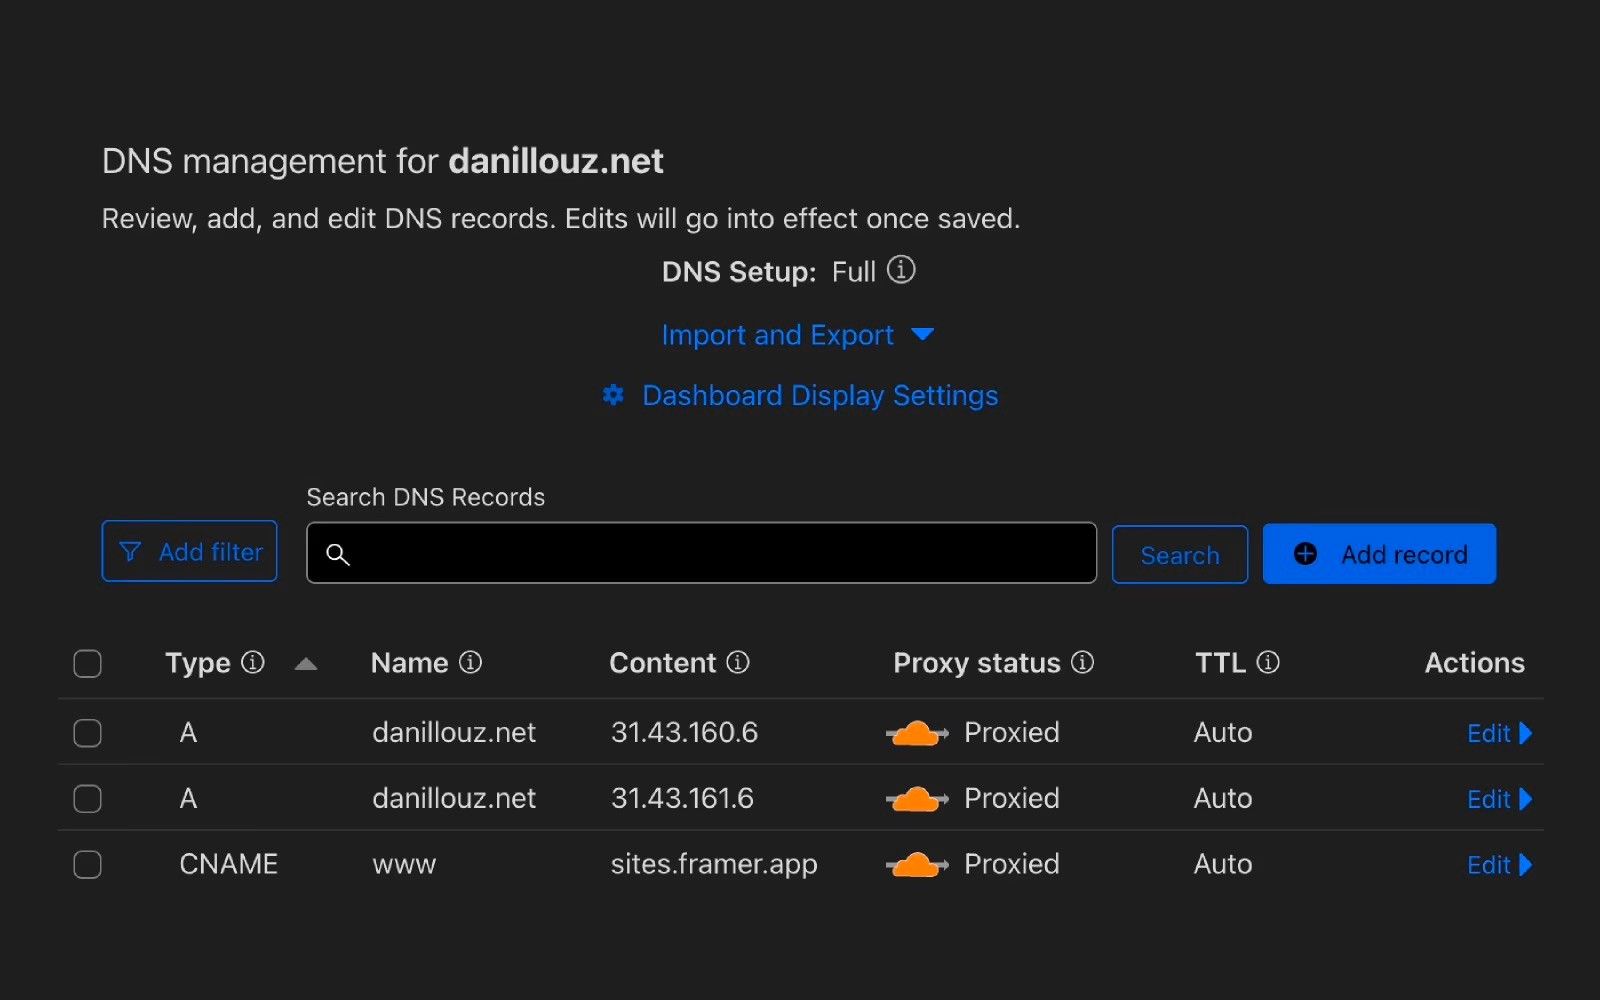
Configure settings
Set the following configurations:
DNS: Proxied
TLS/SSL: Full (Strict)
Always Use HTTPS: Enabled
Automatic HTTPS Rewrites: Enabled
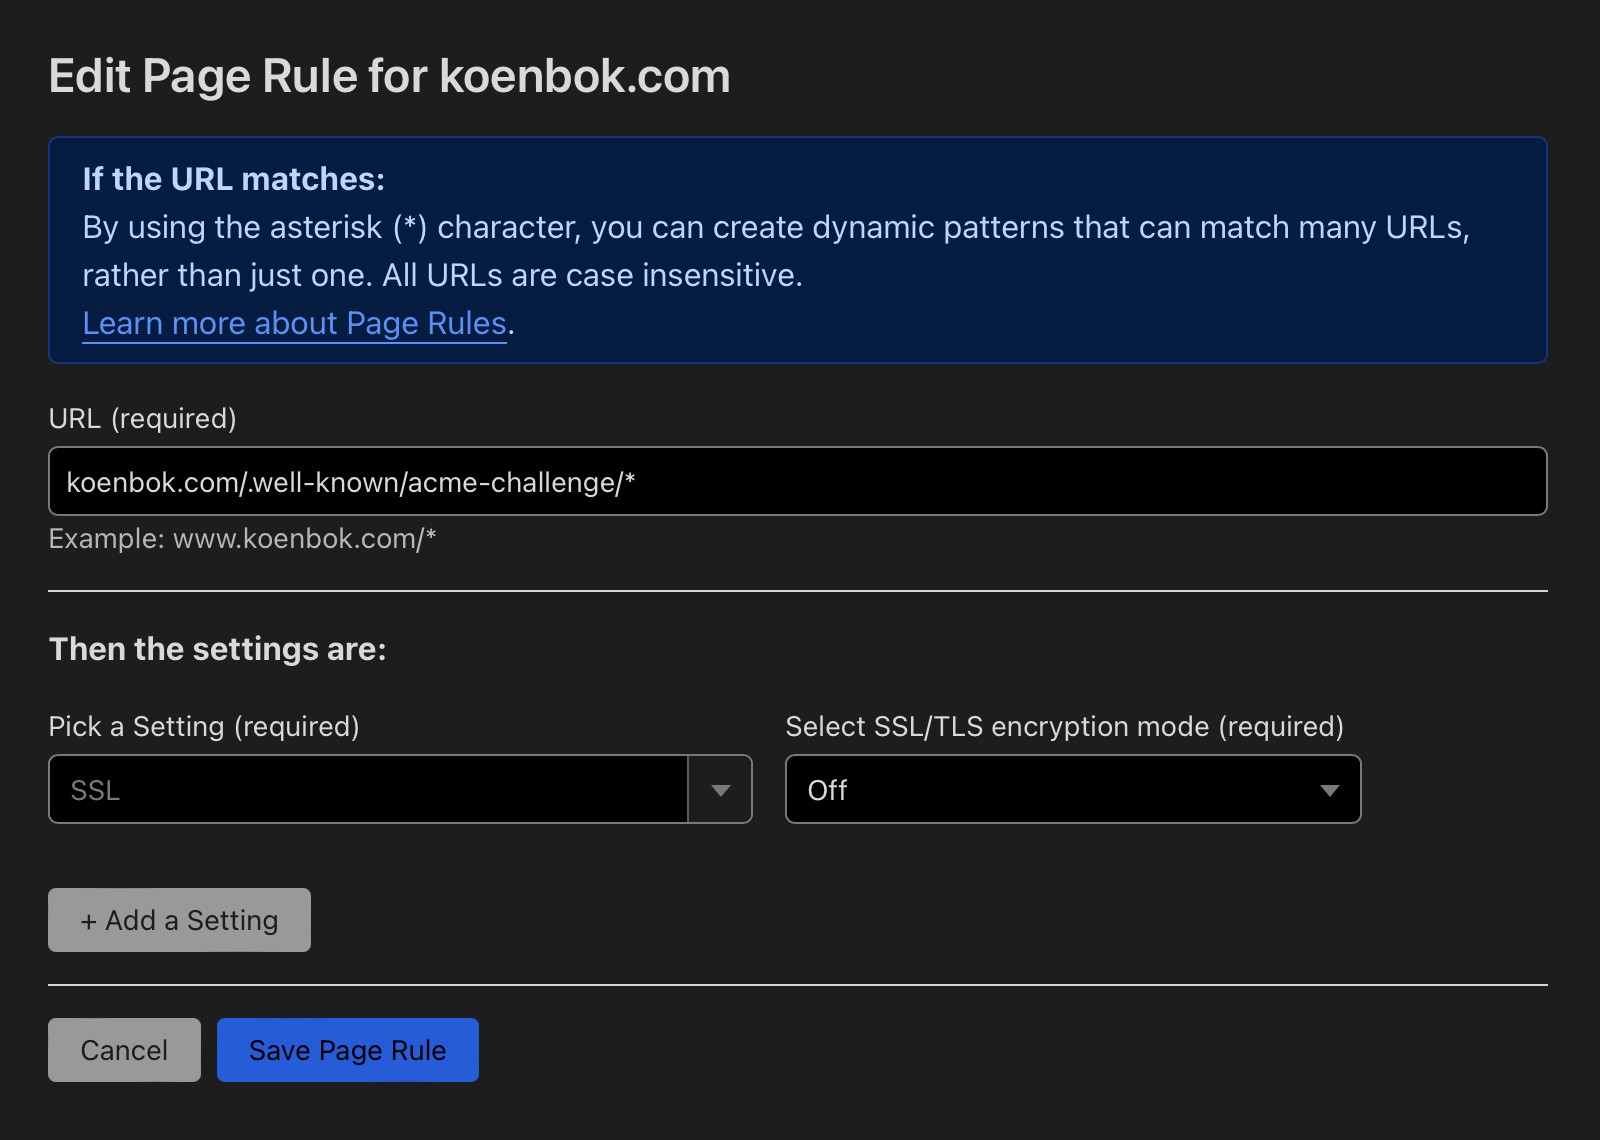
Disabling https/ssl for specific endpoints
For the endpoint Framer uses to generate SSL certificates (/.well-known/acme-challenge/*), SSL/HTTPS must be disabled.
Go to Rules → Page Rules in Cloudflare.
Create a rule for
<domain>/.well-known/acme-challenge/*(replace<domain>with your actual domain, e.g.,koenbok.com).Set the following rule settings:
SSL: Off
Automatic HTTPS Rewrites: Off
Your configuration should look like this:
Verify your setup
Wait for the settings to propagate.
Use the Inspector to check the headers of the served document and confirm that your site is now proxied through Cloudflare.
Still experiencing the issue after following the steps above? If you're still experiencing issues, please reach out to us through our contact page for further help.