Best practices for setting up a component library
In this guide, we explain how to create, share, and manage components in Framer to save time and maintain consistent designs across projects.

FAQ
Why should I create a component library in Framer?
Creating a component library early is key to efficient design. If you’re reusing the same components across projects, a library centralizes them, allowing you to update components once and apply changes everywhere they’re used. This saves time and ensures consistent designs at scale.
How do I add and import components to and from my Framer component library?
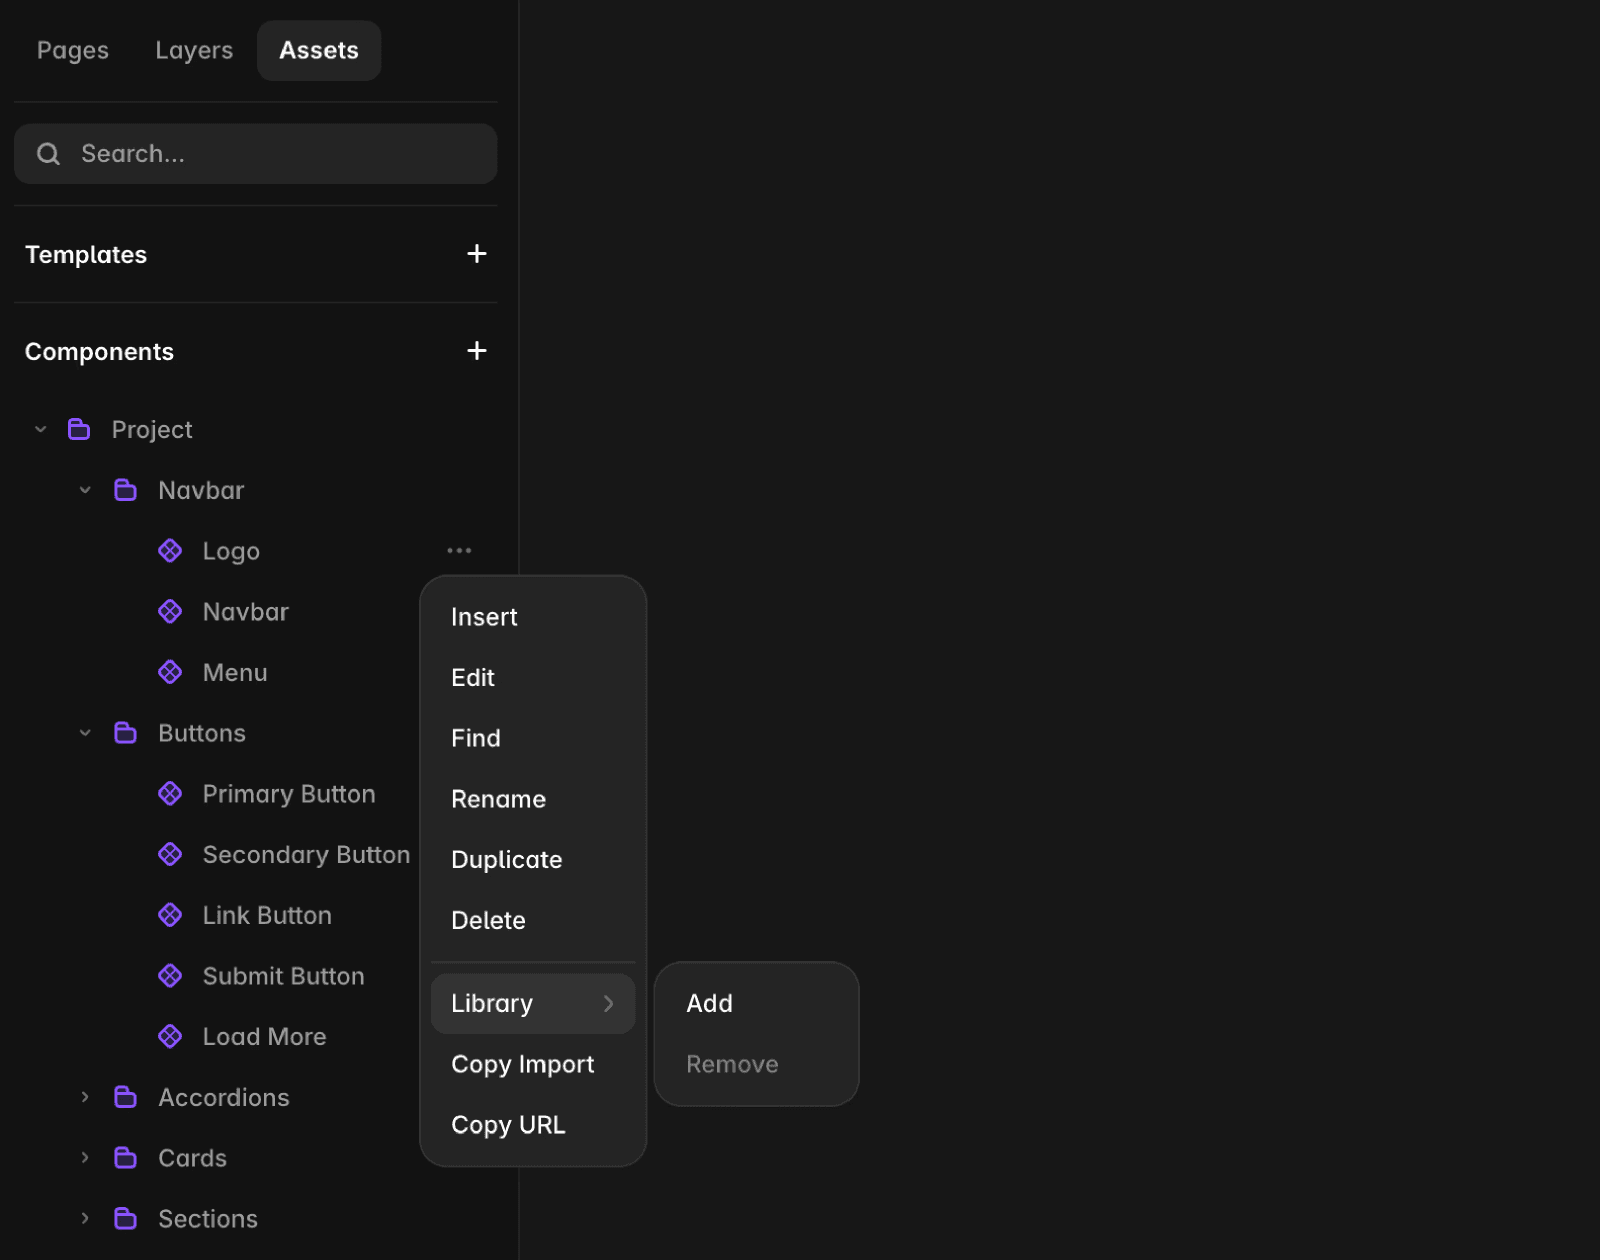
To add a component to your library, navigate to the Assets tab in the left panel, select the desired component, click the three dots next to the component name, and choose 'Add to Library.' To import a component from your library, press ⌘ + / (Mac) or Ctrl + / (Windows) to open the Quick Menu, then browse available components or search for a specific one.
What are some best practices for organizing and updating components in Framer?
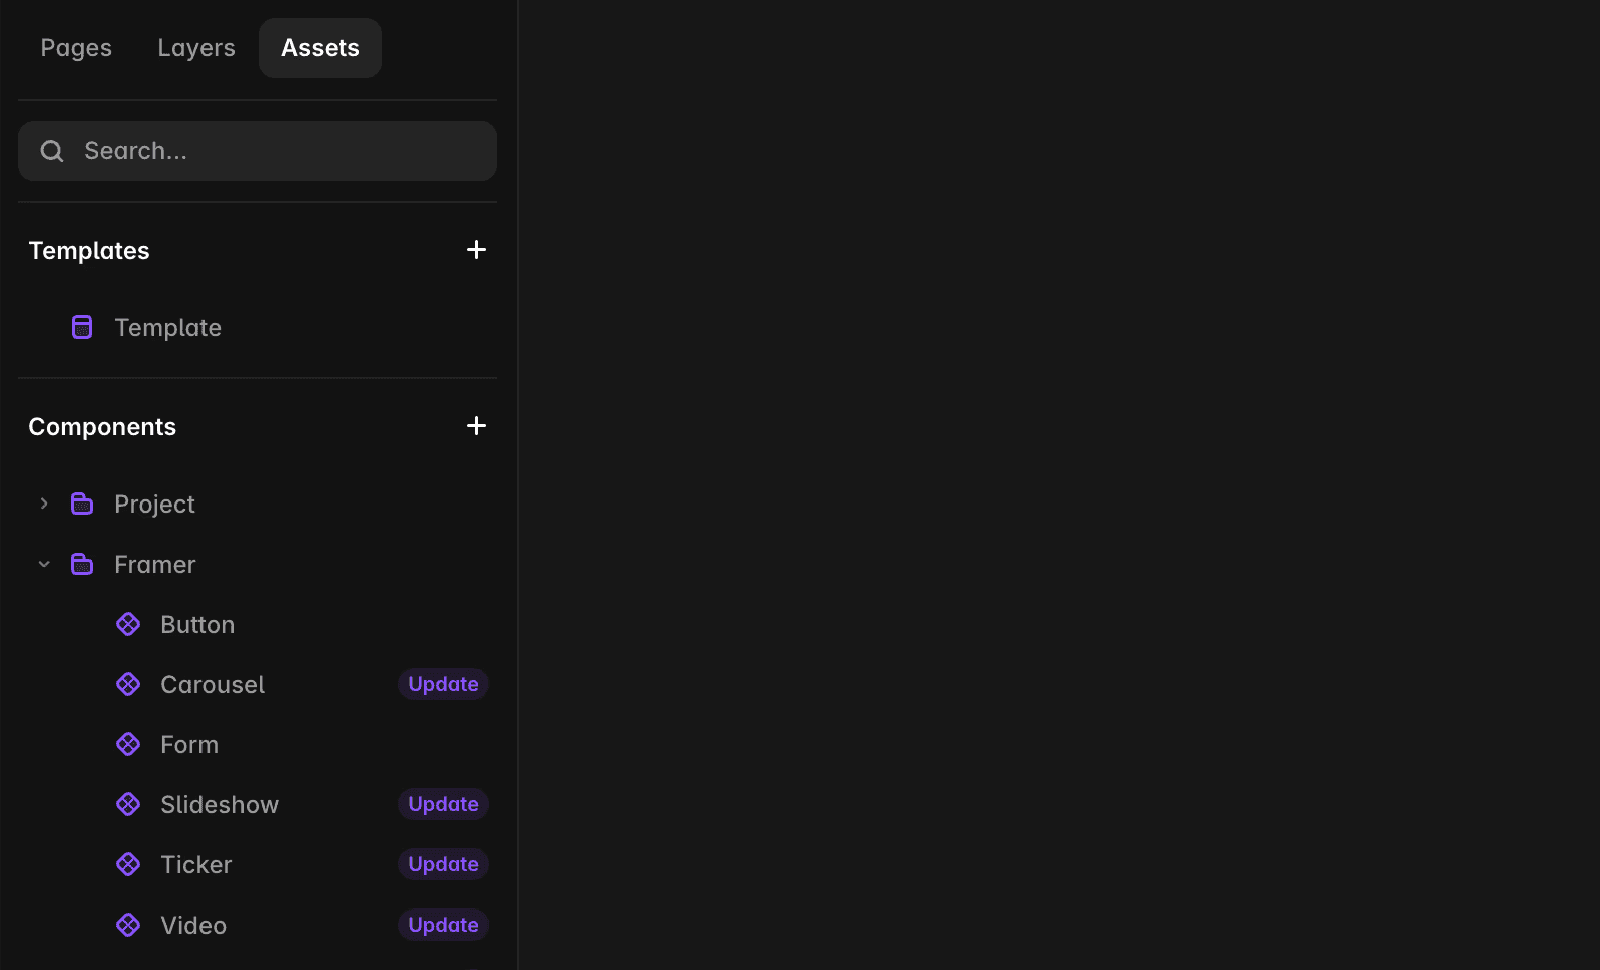
Use naming conventions such as a forward slash for folders (e.g., Navigation/Menu) and include states, themes, and variations in component names (e.g., Buttons/Navigation/PrimaryButton). Keep all components in a single project for easy updates and scalability. Name component variants as Desktop, Tablet, and Phone to ensure Framer automatically selects the correct variant for each breakpoint. Define proper maximum/minimum width and height for components to ensure predictable behavior when resized. When you update a component in the master file, an 'Update' button appears next to the component name in the Assets tab of all projects using it—click 'Update' to bring the component to its latest version.
Updated