How to proxy with Cloudflare
You can use Cloudflare with Framer to enable reverse proxying—ideal for advanced use cases like traffic management, custom routing, and compliance with infrastructure policies.
Reverse proxying places a service—like Cloudflare—between your site and visitors. This setup enables:
Integration with internal infrastructure (e.g. firewalls or routing rules)
Compliance with advanced logging or regulatory requirements
Control over CDN, caching, or geographic traffic management
Reverse proxying is only recommended for users with specific infrastructure or policy needs, as Framer already handles many of these capabilities natively.
Note: Reverse proxying is available on Scale and Enterprise plans.
Set up your Framer site
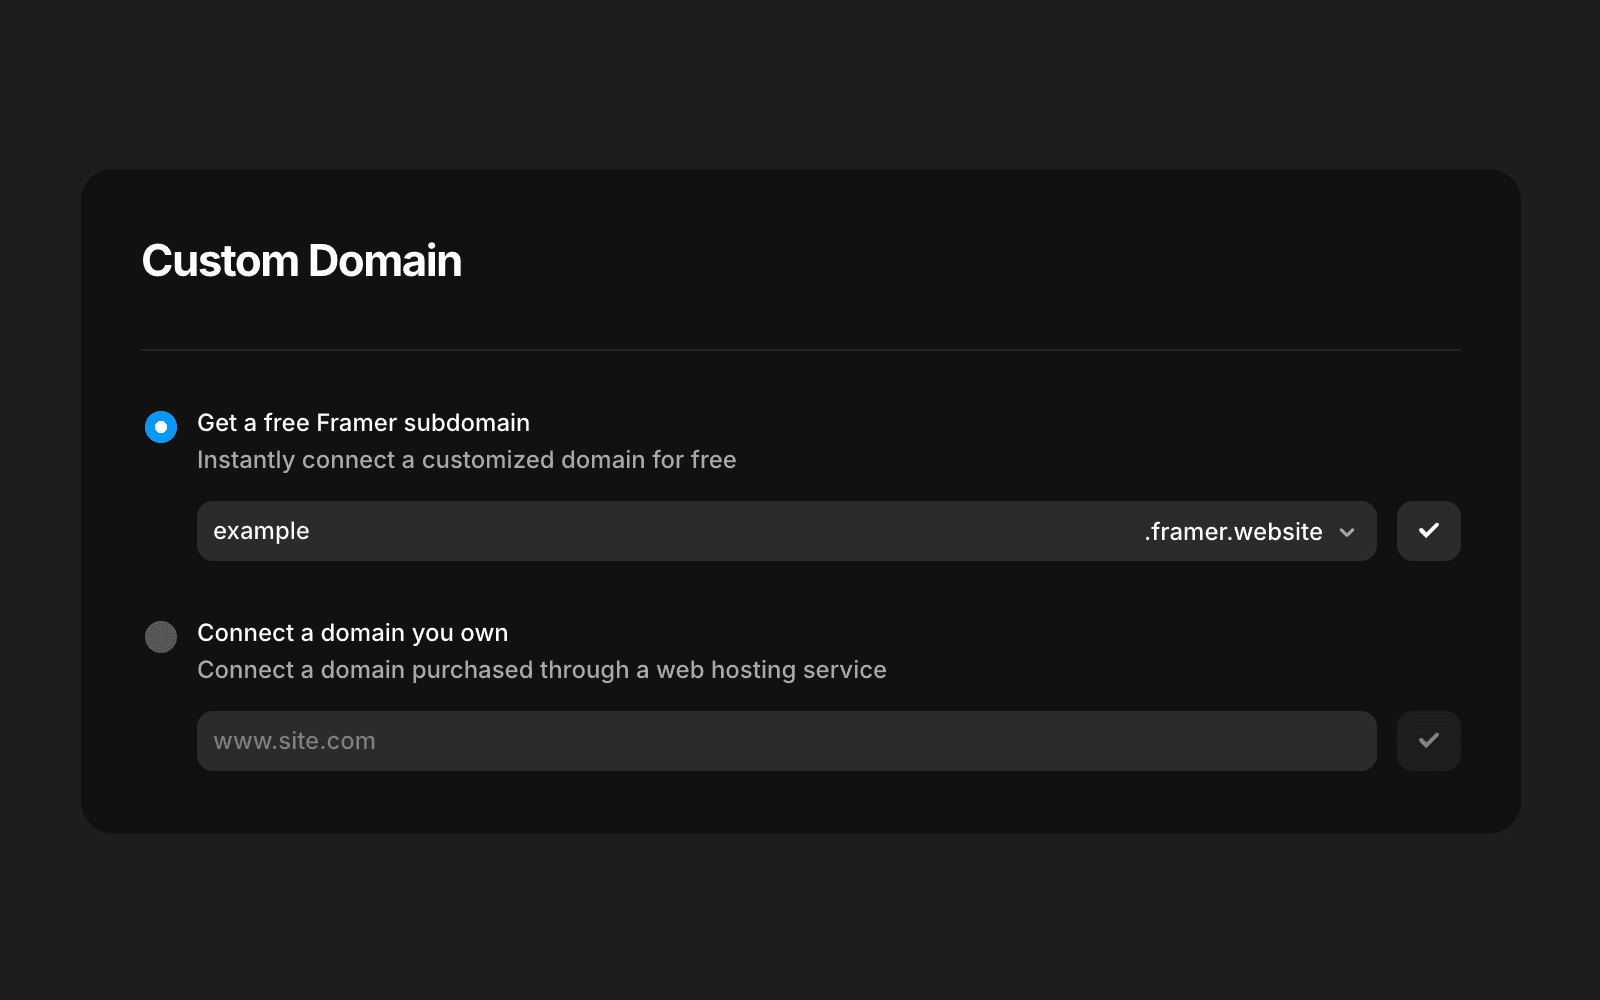
To start, open your Framer project and navigate to Site Settings → Domains. Add a free Framer subdomain to your site, such as example.framer.website.
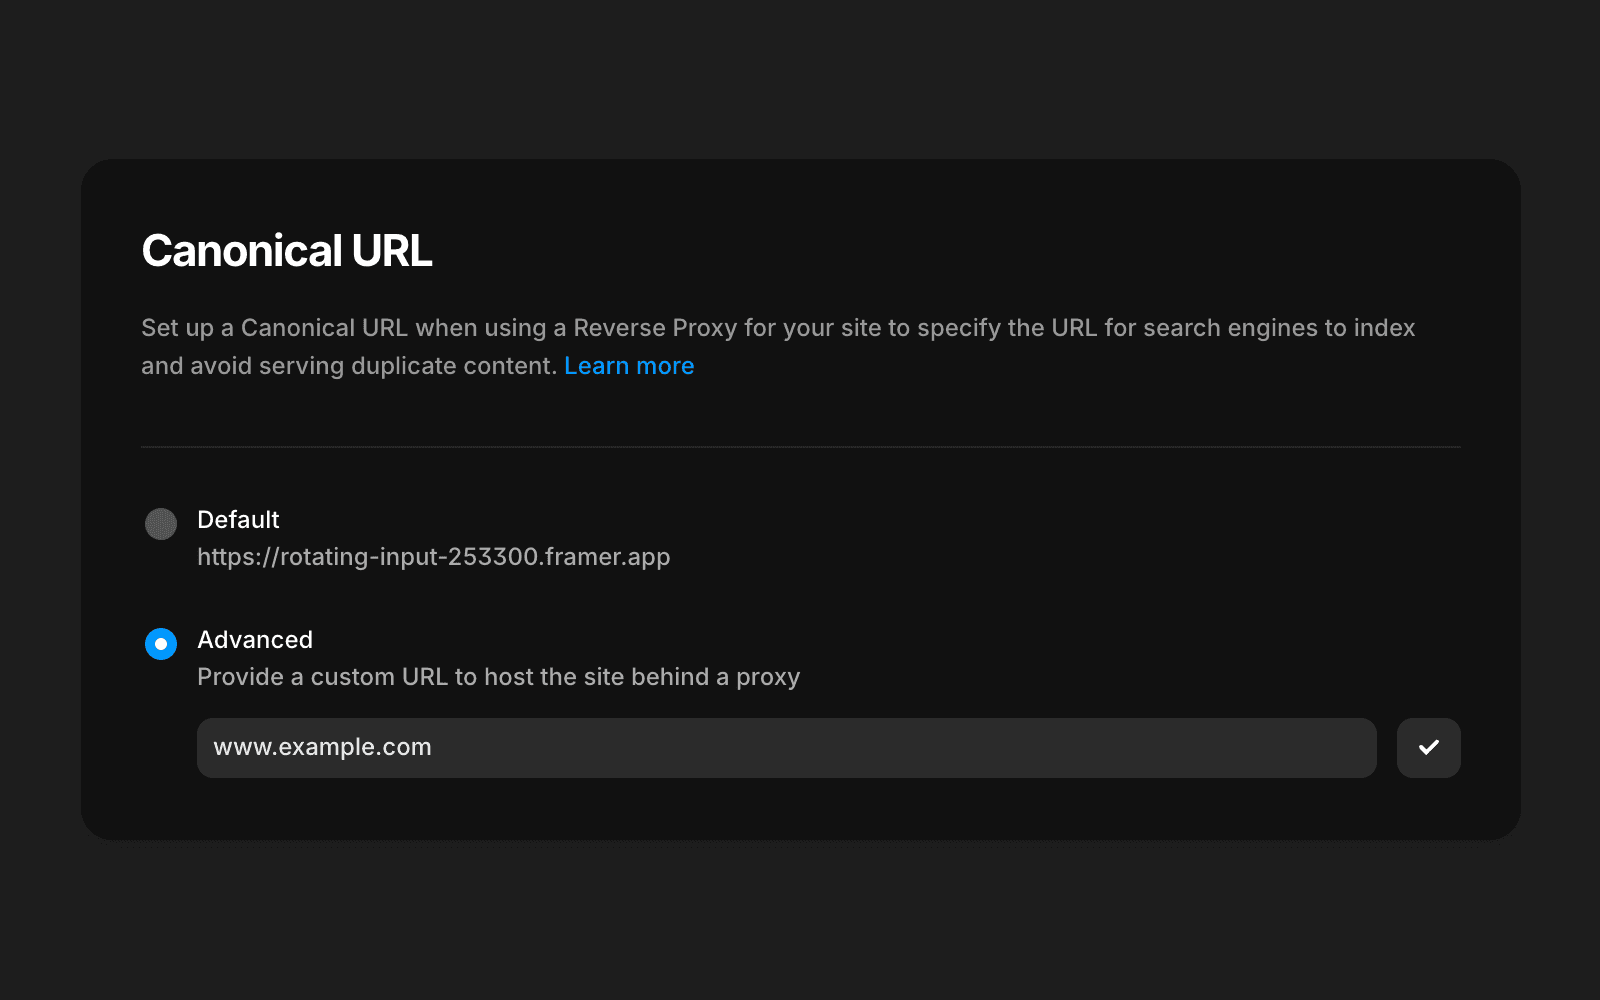
Next, scroll to the bottom of the Domains section to set a canonical URL. In the “Advanced” input, enter your custom domain (for example, example.com) and publish your site.
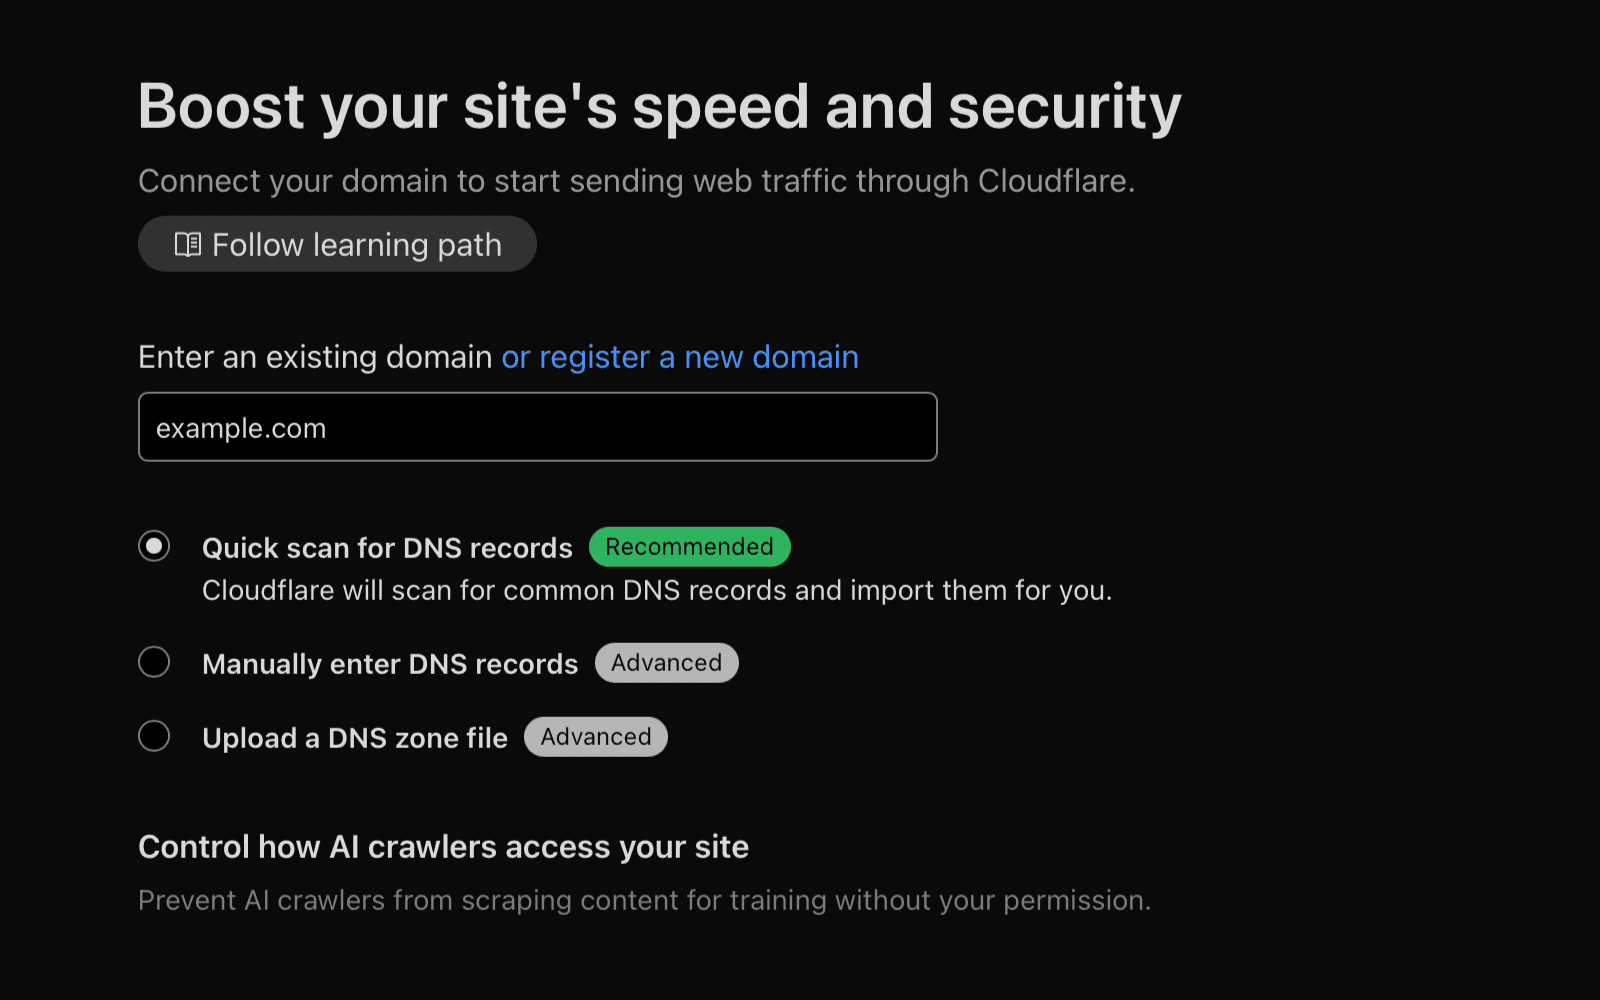
Configure your domain in Cloudflare
Log into Cloudflare and add your custom domain—for example, example.com.
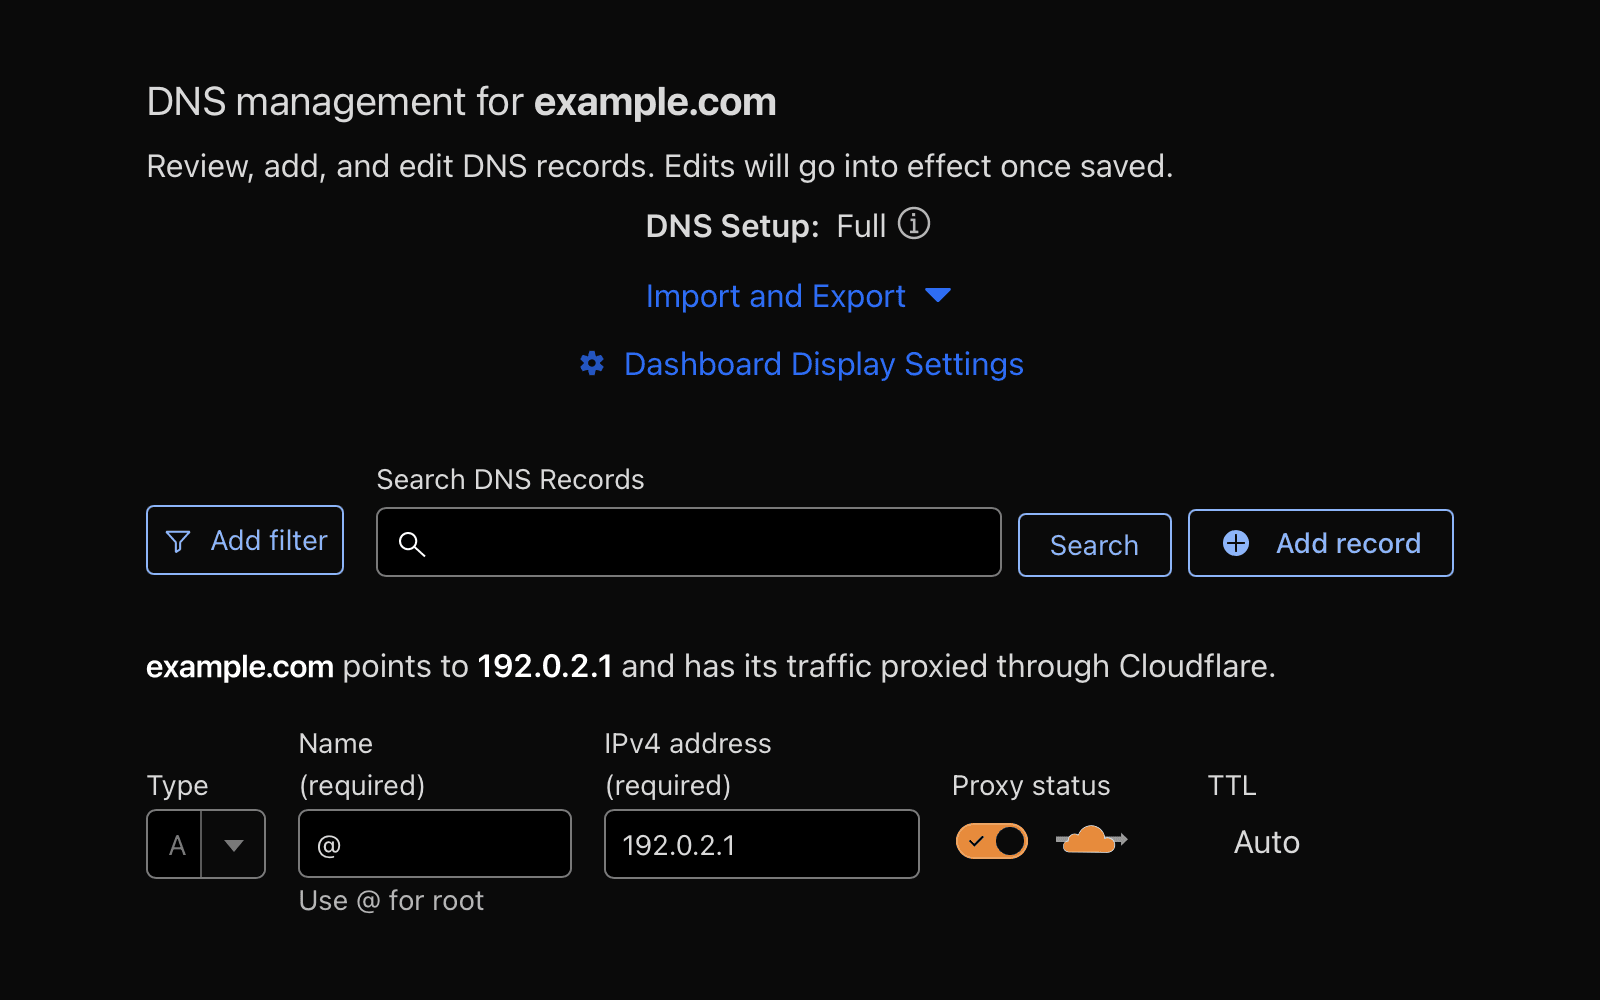
Next, go to your DNS settings and point either the root (@) or a subdomain like app.example.com to a dummy A record such as 192.0.2.1.
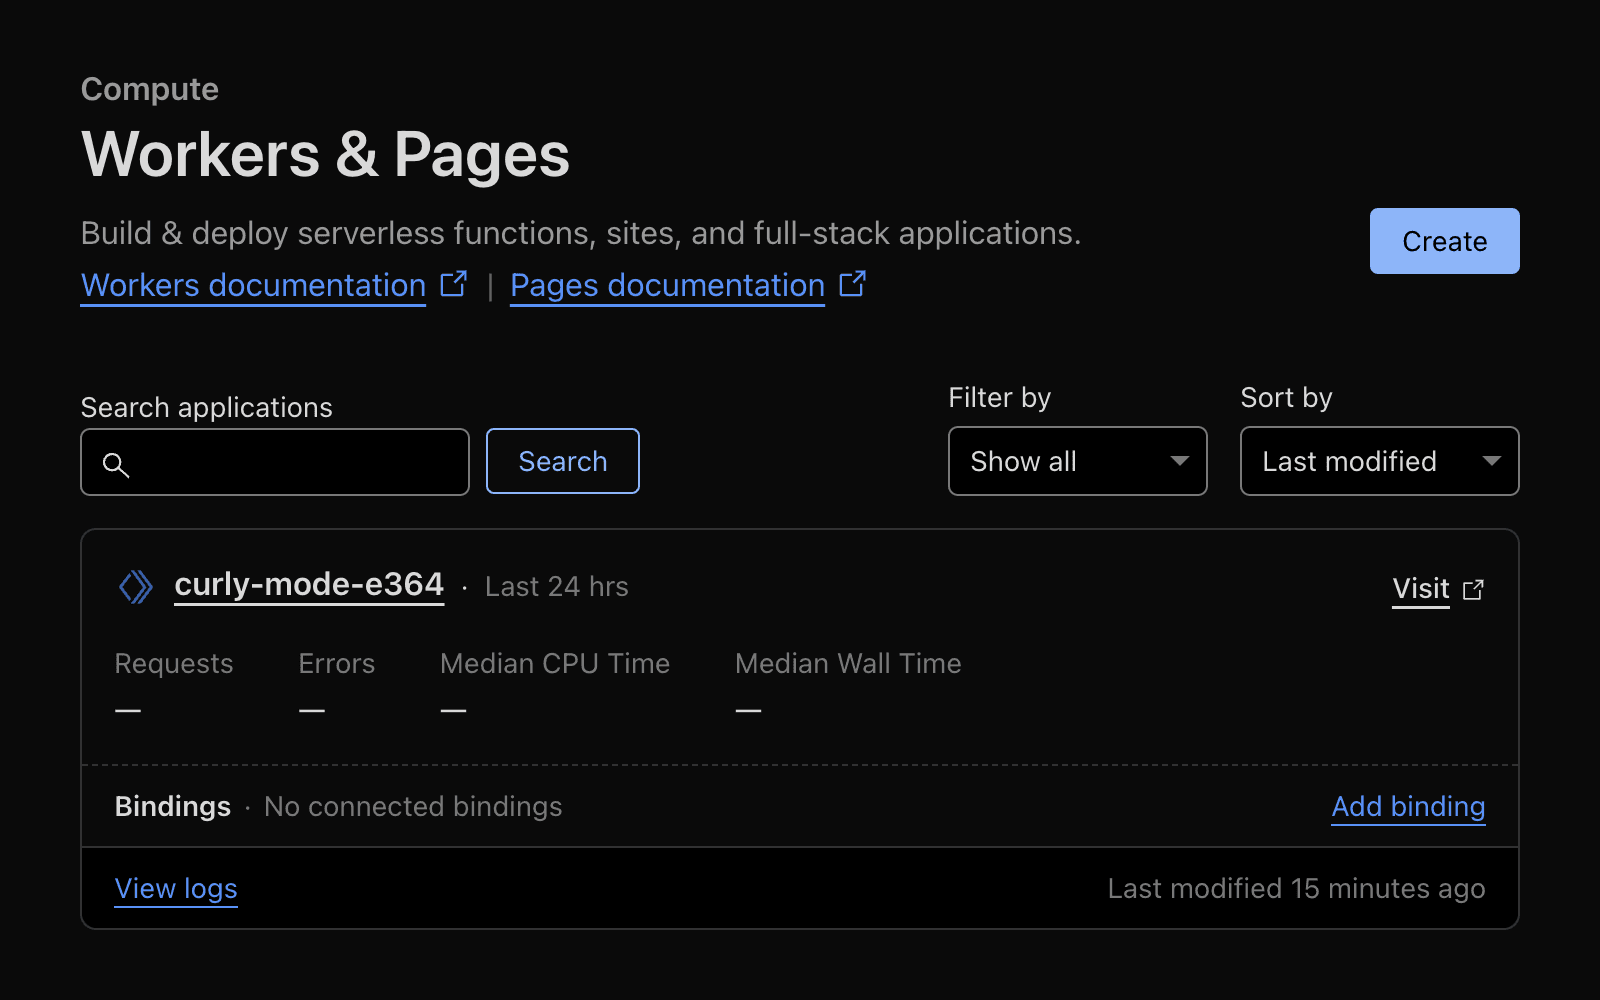
Create a Cloudflare Worker
In the Cloudflare dashboard, navigate to Workers & Pages and select Create to set up a new Worker. Then, assign a route to your Worker—something like example.com/*—so it can handle all incoming traffic.
Use the following code in your Worker to forward requests to your Framer subdomain. Replace the example URL with your actual Framer domain:
Verify your setup
Ensure your Worker is assigned to the correct domain route.
Wait a few minutes for changes to propagate.
Use developer tools or an HTTP header inspector to confirm that traffic is routed through Cloudflare.
Important: Please also turn off the ”Rocket Loader” feature (Speed → Optimization → Content optimizations). Framer’s JavaScript is already optimized to load as fast and efficient as possible.
If you encounter any issues or need further assistance, feel free to contact Framer’s support team through our contact page.
See also our built-in hosting features Multi Site rewrites and Custom Headers.
FAQ
How do I set up reverse proxying for my Framer site using Cloudflare?
To set up reverse proxying, first open your Framer project and go to Site Settings → Domains. Add a free Framer subdomain (e.g., example.framer.website). Then, set a canonical URL in the Domains section by entering your custom domain (e.g., example.com) in the 'Advanced' input and publish your site. In Cloudflare, add your custom domain, and in DNS settings, point the root (@) or a subdomain to a dummy A record like 192.0.2.1. Next, create a Cloudflare Worker, assign a route (e.g., example.com/*), and use the provided Worker code to forward requests to your Framer subdomain. Make sure your Worker is assigned to the correct route and verify traffic is routed through Cloudflare.
Who should use reverse proxying with Framer, and on which plans is it available?
Reverse proxying is recommended only for users with specific infrastructure or policy needs, such as integration with internal infrastructure, compliance with advanced logging or regulatory requirements, or control over CDN, caching, or geographic traffic management. Framer already handles many of these capabilities natively. Reverse proxying is available on Scale and Enterprise plans.
What are some important steps to verify my Cloudflare reverse proxy setup for a Framer site?
To verify your setup, ensure your Cloudflare Worker is assigned to the correct domain route, wait a few minutes for changes to propagate, and use developer tools or an HTTP header inspector to confirm that traffic is routed through Cloudflare. If you encounter issues, you can contact Framer’s support team through their contact page.
Updated