How to update page titles, descriptions, and social images
Learn how to set default and page-specific metadata in Framer, including dynamic values for CMS items.
Page titles, descriptions, and social images control how your site appears in search results and when shared on social platforms. Framer lets you define global defaults and override them at the page or CMS level, so each page can be optimized for search and sharing. See Meta Tags.
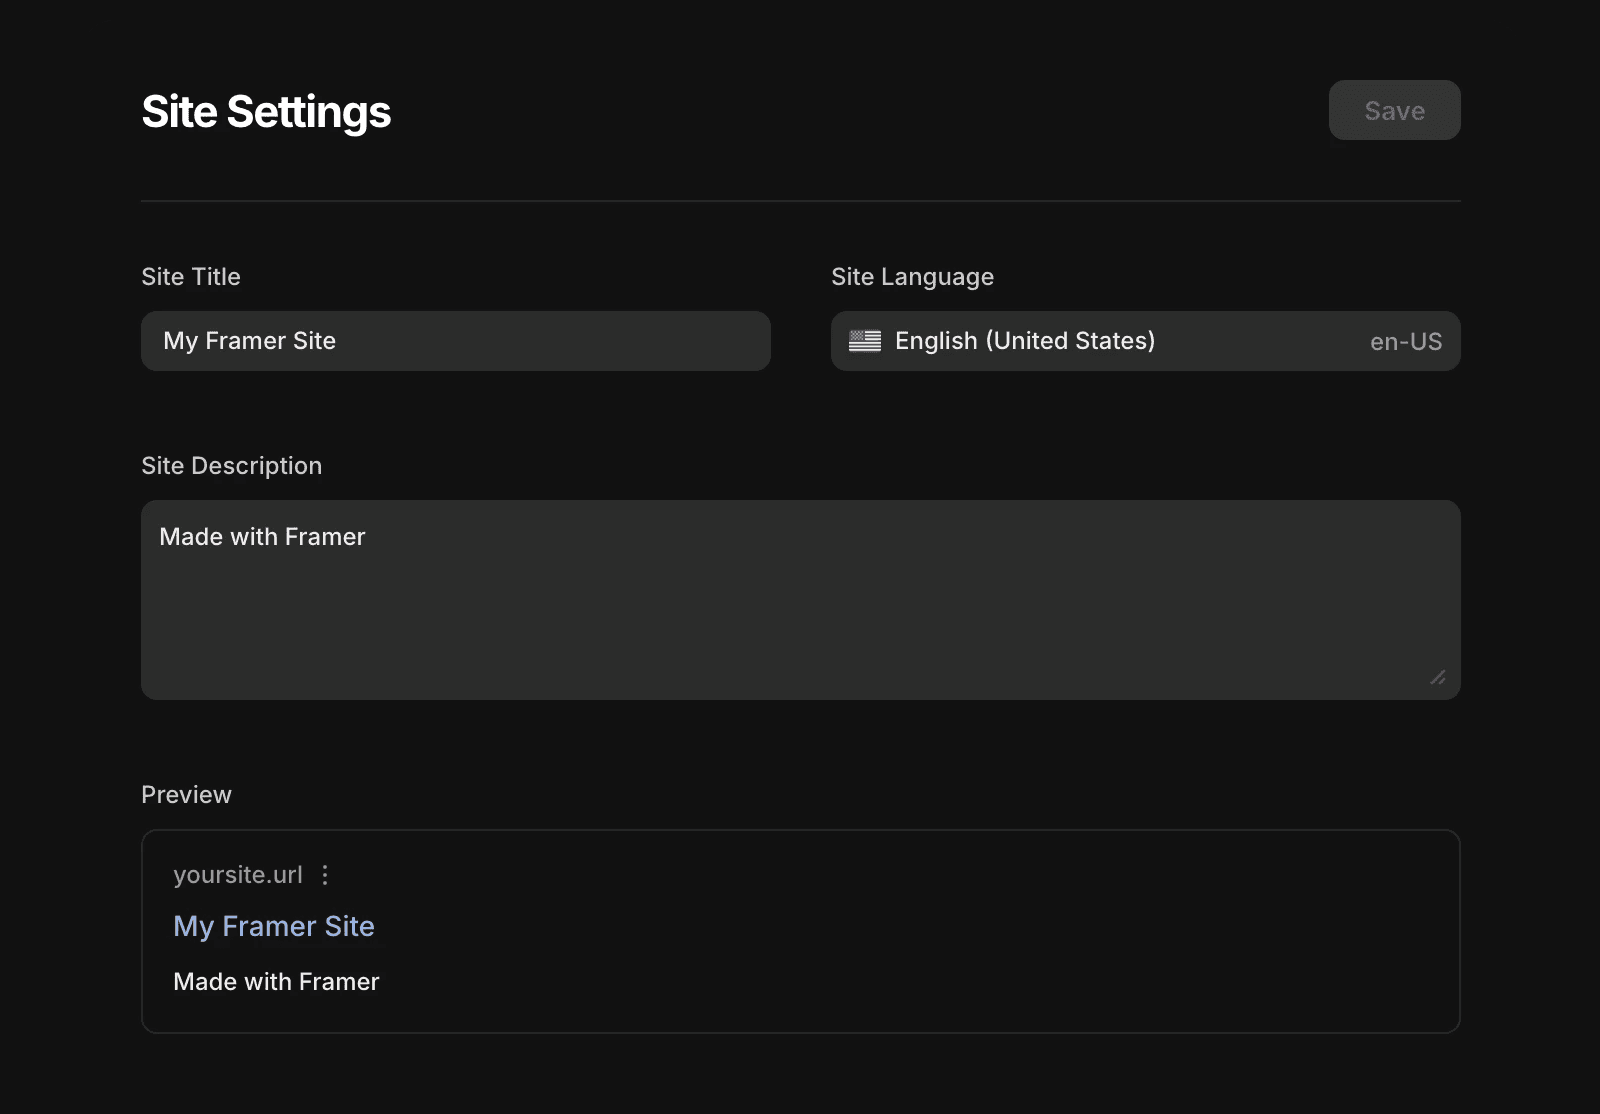
Set default site titles and descriptions
Start by defining the default metadata for your entire site. These values apply to all pages unless you override them later.
Open your project’s Site Settings.
Enter a Site title and Site description.
Publish your site.
Use clear, concise language that describes your site as a whole.
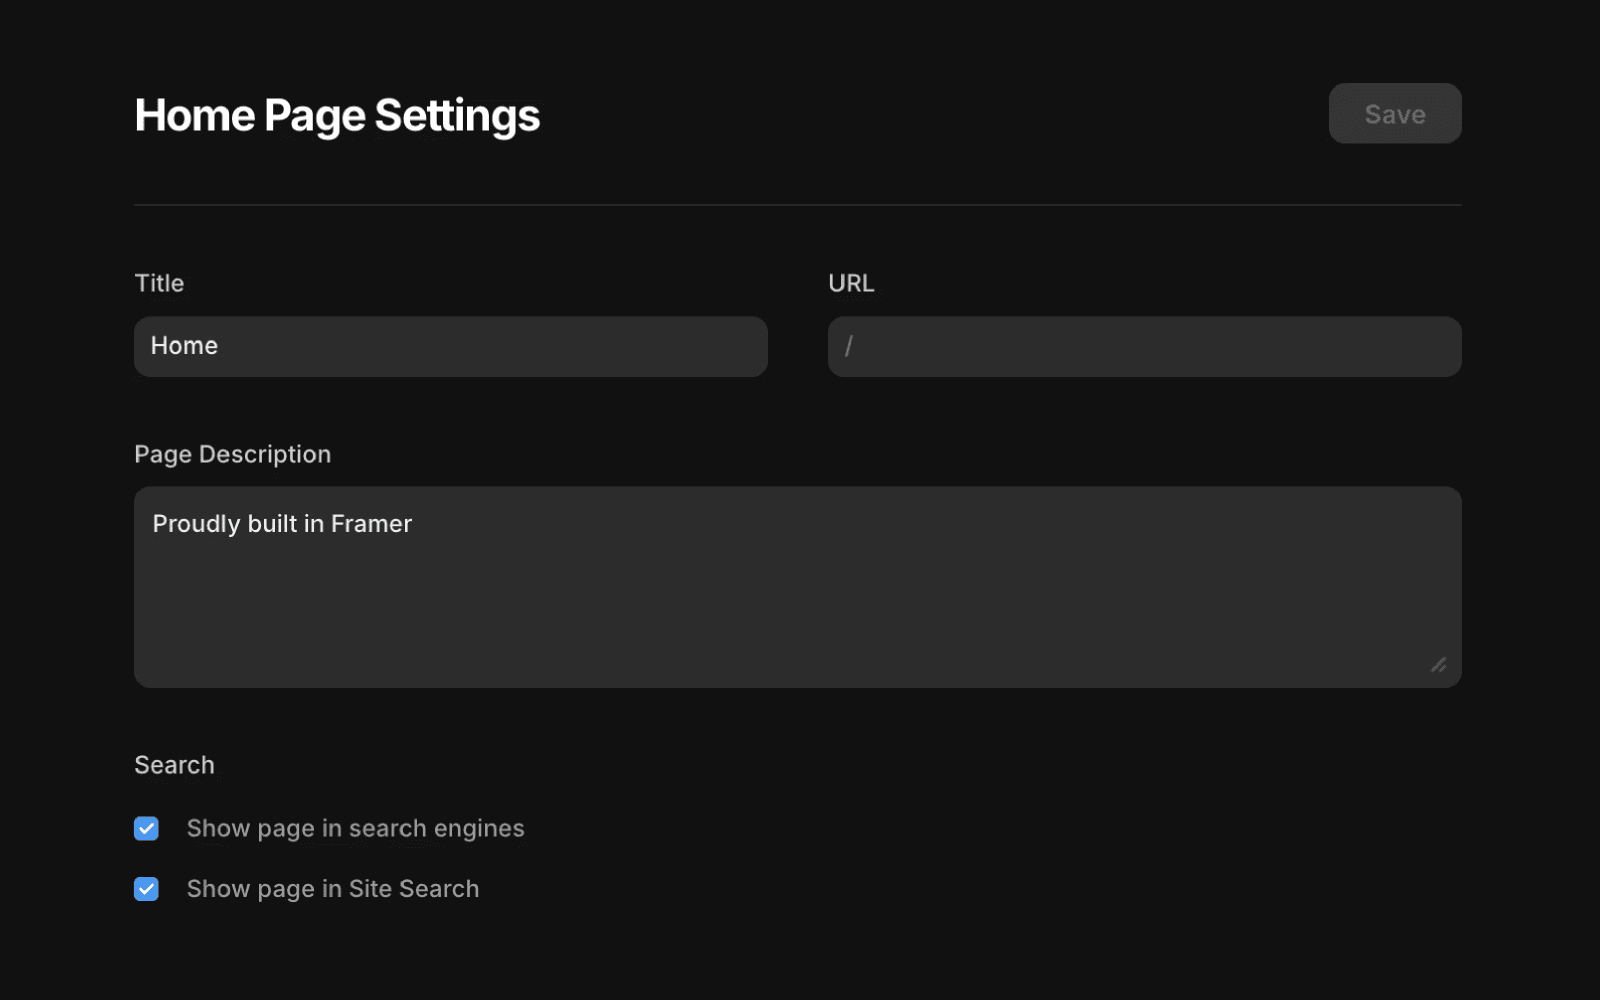
Override titles and descriptions for individual pages
If a page needs unique metadata, you can override the site defaults in its Page Settings.
Open your project settings.
Select the page under Page Settings in the left panel.
Enter a custom Title and Page Description.
Click Save, then re-publish your site.
You can also control whether the page appears in search engines or site search from this panel.
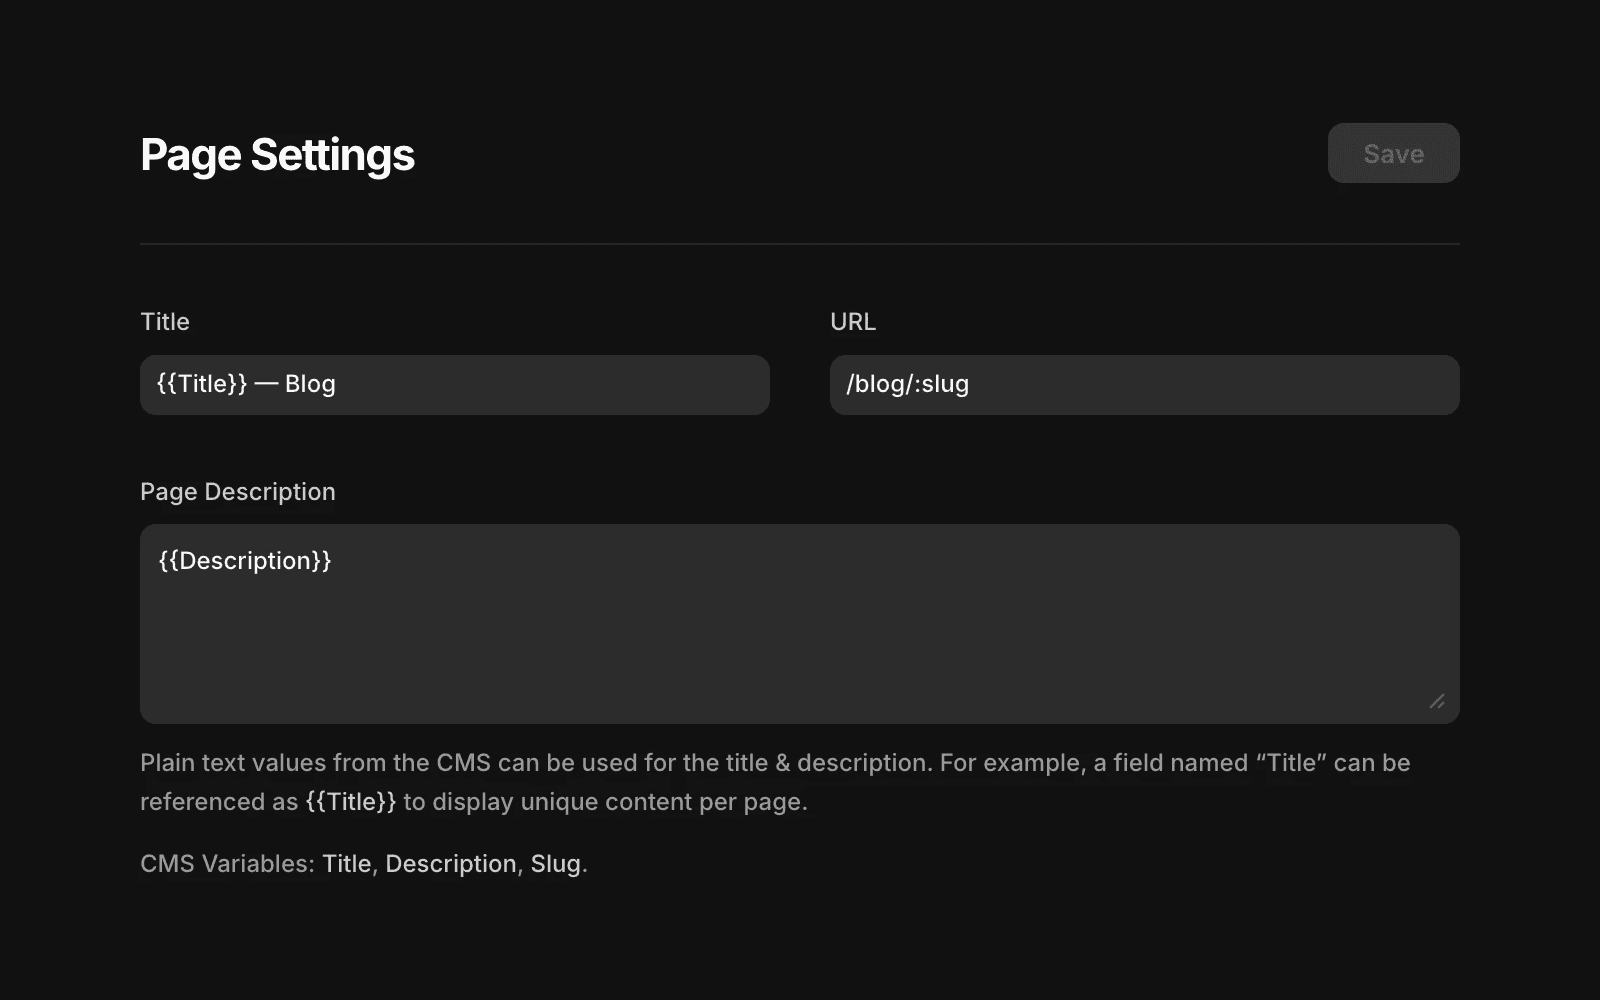
Add dynamic meta titles and descriptions for CMS items
For CMS-driven pages, you can use dynamic values so each item has its own metadata. This improves SEO and helps search results better reflect your content.
You can use CMS fields to dynamically populate both meta titles and descriptions, so each CMS page reflects its individual content in search results.
In your CMS, create Plain Text fields for your metadata.
Use one field for the title (for example, “Title”).
Use another field for the description (for example, “Description”).
Fill in these fields for each CMS item.
Open the CMS page’s Page Settings.
In the Title field, enter
{{Title}}to pull in the CMS title.In the Page description field, enter
{{Description}}to pull in the CMS description.
You can also combine static text with variables, such as {{Title}} – Blog, to add consistent branding while keeping titles unique.
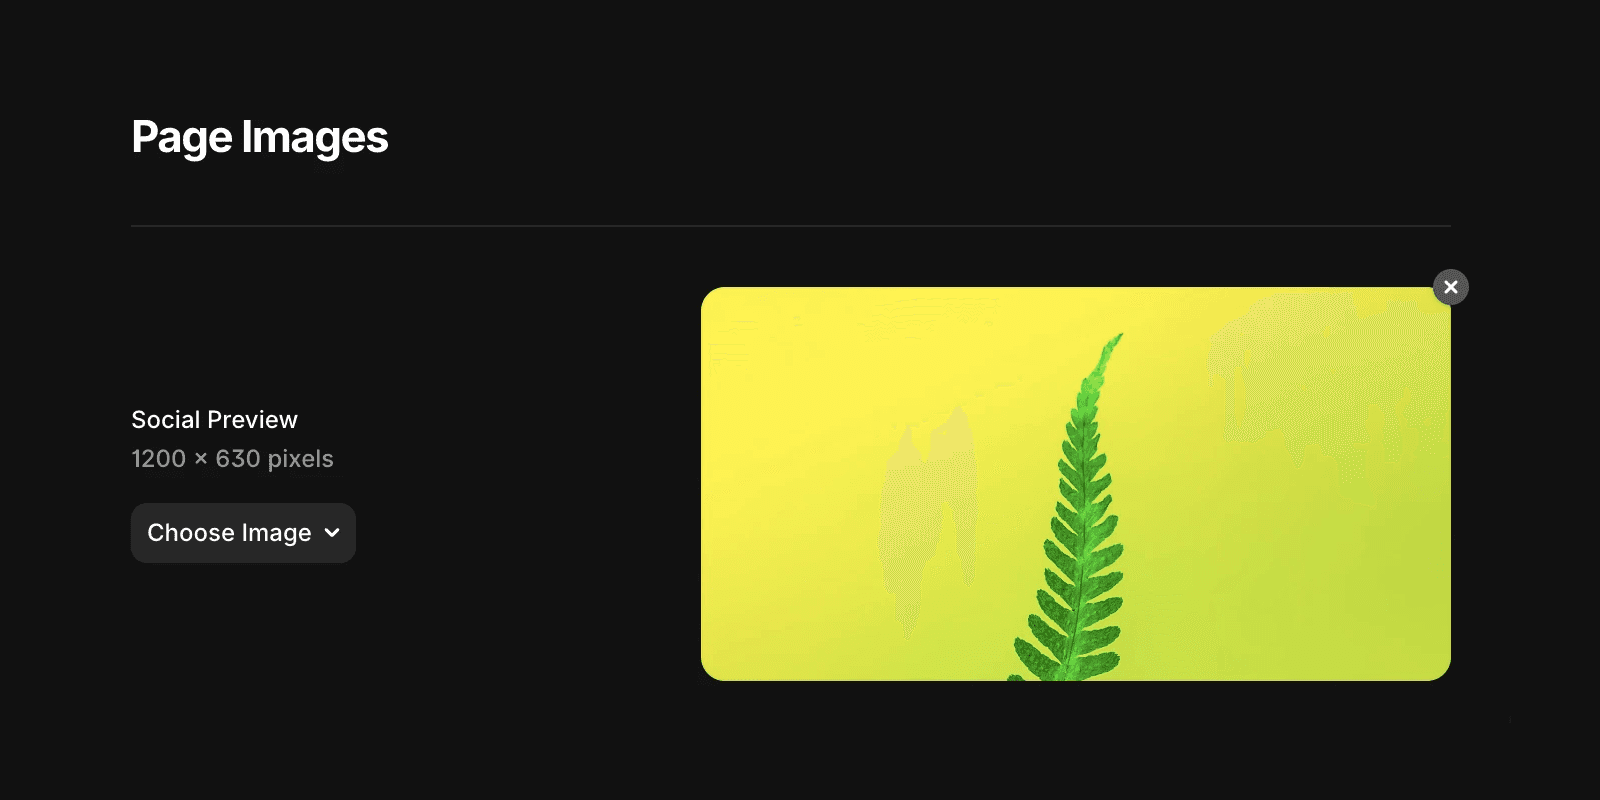
Set CMS cover images for social previews
CMS cover images control the image shown when a CMS page is shared on social platforms like X, LinkedIn, Slack, or in messaging apps. Each CMS item can have its own social preview image.
Add an Image field to your CMS (for example, “Cover image”).
Upload an image for each CMS item.
Open the CMS page’s Page Settings.
In Page images, under Social preview, choose CMS Variables and select your image field.
Framer uses a 1200 × 630 pixel aspect ratio for social previews. For best results, upload images that match this size and keep important content centered.
Preview and validate your metadata
To see how your titles and descriptions appear across services like Google, X, LinkedIn, and Slack, use Framer’s Link Preview tool. This helps you catch issues before publishing.
Control Google’s automated descriptions
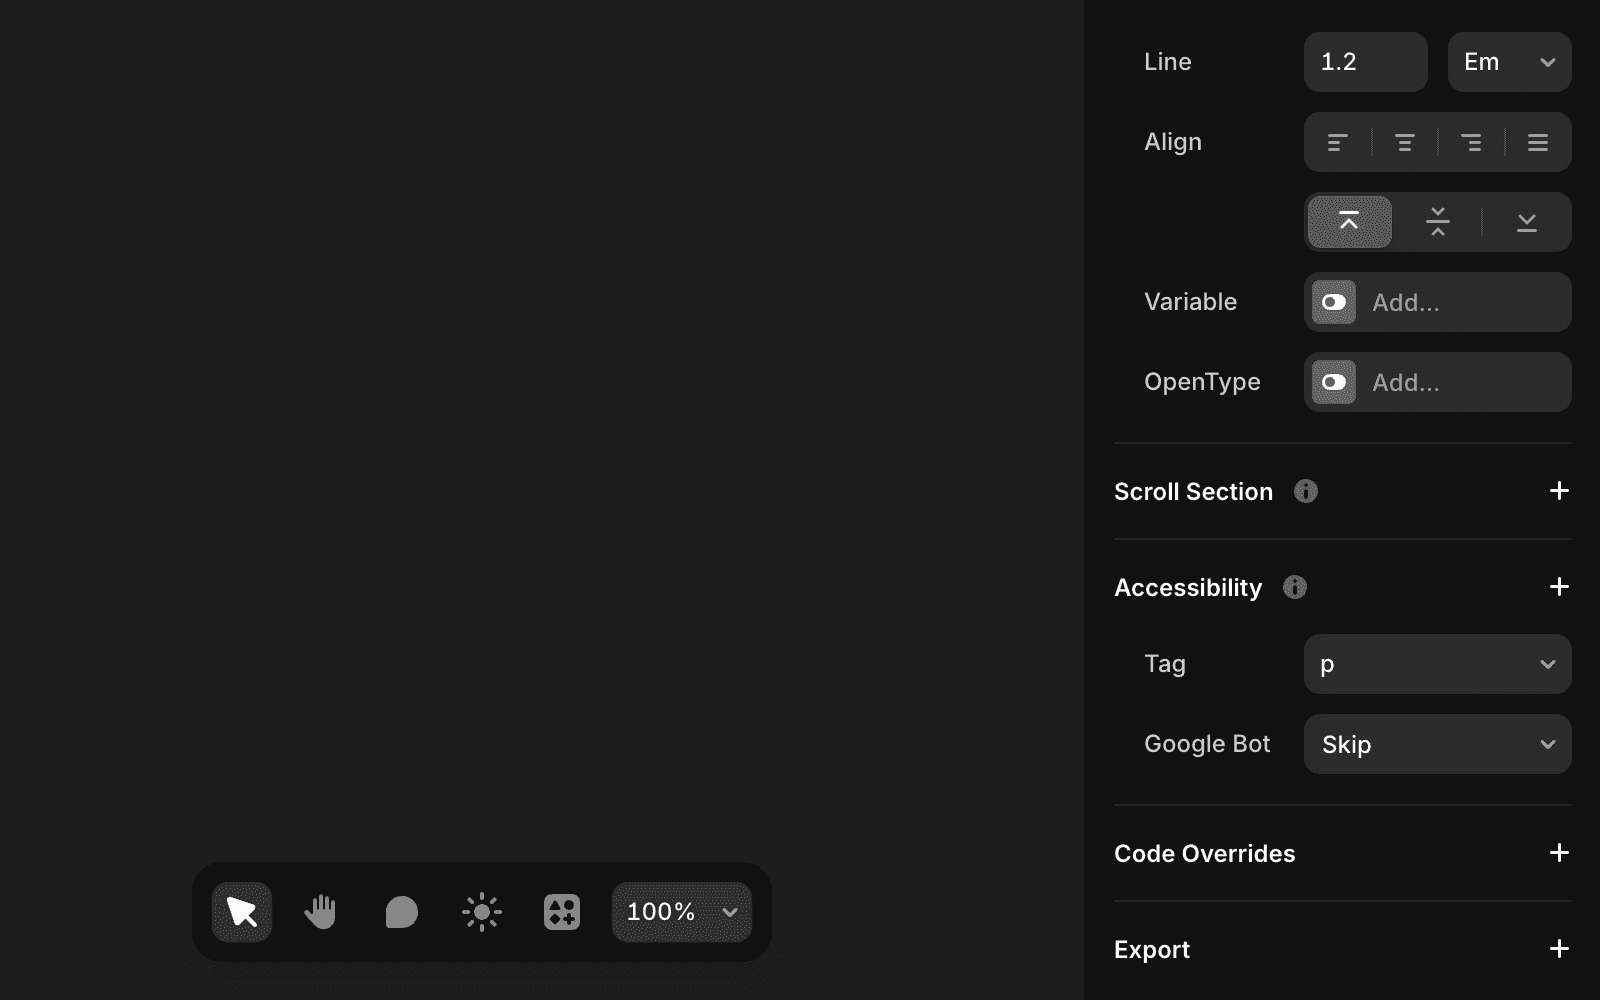
Google may replace your meta description with other on-page text if it considers it more relevant. You can limit this behavior using accessibility settings.
Select the content you want Google to ignore.
Open Accessibility, click +, choose Google Bot, and set it to Skip.
To prevent Google from selecting any text, apply this setting to the outermost frame.
FAQ
How do I set custom meta titles for CMS items in Framer?
To set custom meta titles for CMS items, create or use a Title field in your CMS. If it doesn’t already exist, add a Plain Text field dedicated to page titles. In the Title field of your page settings, enter {{Title}} to dynamically insert the title from the CMS item.
How can I add custom meta descriptions for each CMS item?
Add a Description field to your CMS (you can name it 'Description' or any preferred name). Fill the field with the description you want for each CMS item. In the Page Description field of your page settings, enter {{Description}} to dynamically insert the CMS item’s description.
What can I do if Google replaces my meta description in search results?
Google sometimes replaces your meta description with text it considers more relevant to the search query. To limit this behavior, select the content you think Google might pick in your canvas. In Accessibility, click +, choose Google Bot, and set it to Skip. To prevent Google from picking any text, apply this setting to the outermost frame.
Why is my social preview image not updating after I changed it?
This is usually caused by caching on external platforms like Slack, LinkedIn, or X (Twitter). Even after you’ve updated your social image and published your site, these platforms may continue showing the old image until their cache refreshes. You can verify your updated image is being served correctly using the Link Preview tool.
Updated
