How to migrate to Framer page-by-page
Learn in this guide how to move your site from an external platform to Framer gradually and without any downtime!
With the following setup prepared, you can start migrating your site to Framer using Advanced Hosting. You can then add page by page while any missing pages are still served from your old site. Follow the migration steps below to move your site to Framer.
Info | |
|---|---|
| Your custom domain |
| Another domain pointing to your externally hosted site |
| Framer staging domain (provided) |
Migration steps
1. Create New Project
In the Framer dashboard, create a new project and publish it.
2. Add Your Domain
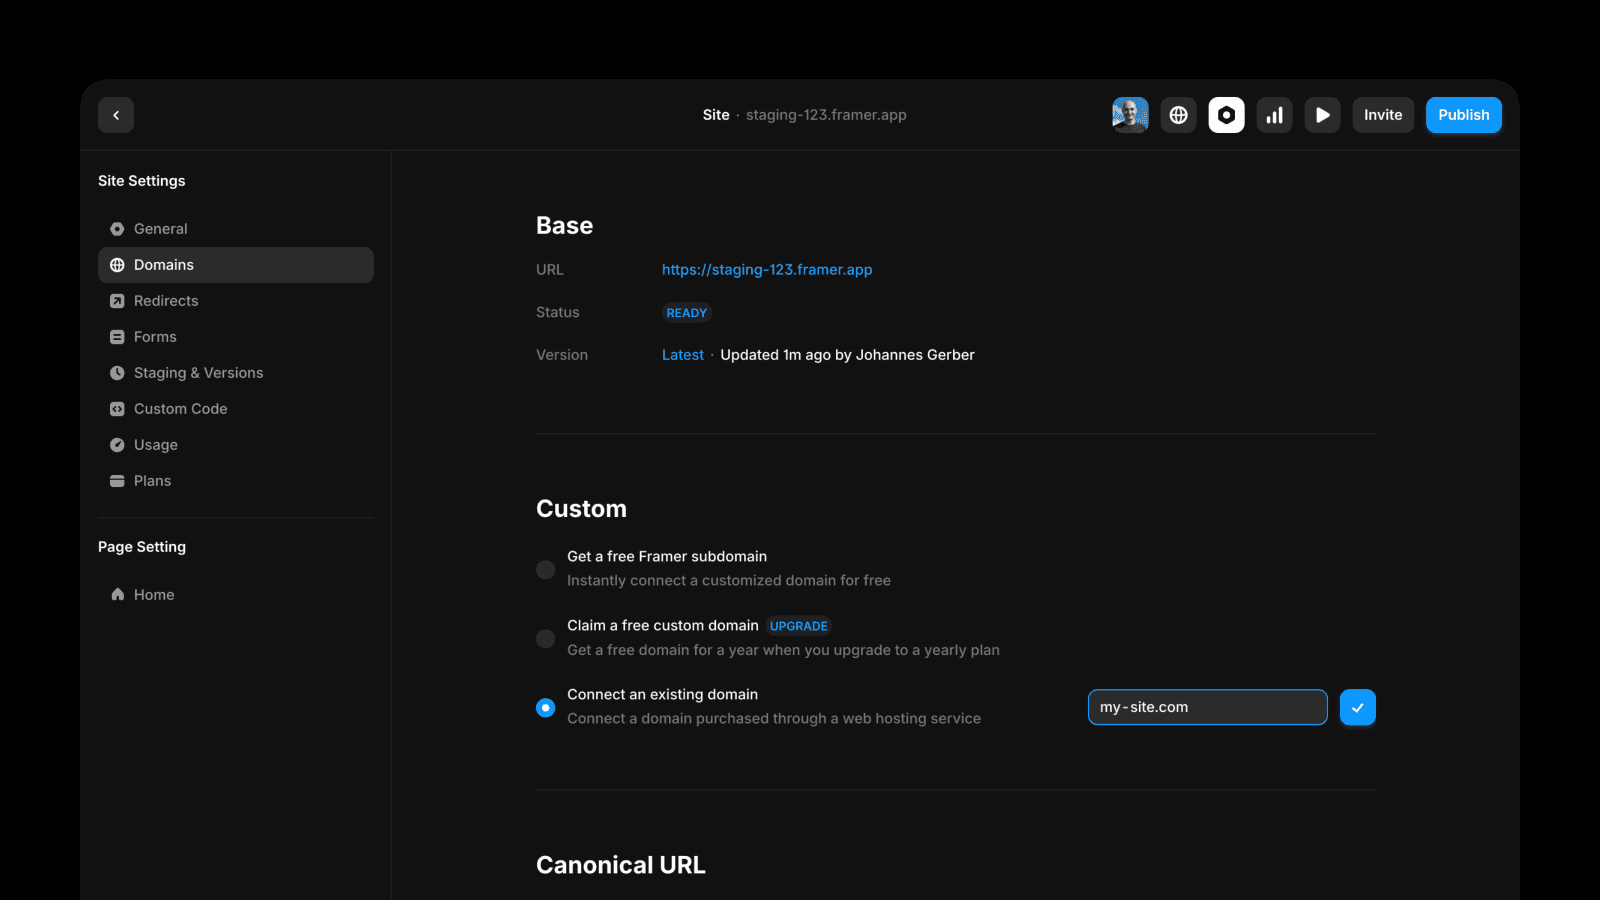
Go to Settings → Domains and connect your domain to your project (e.g. my-site.com).
Important: Don't make any DNS changes on your domain provider side just yet! (The connection of a custom domain is needed to access the Advanced Hosting dashboard in Framer.)
3. Add Rule With Wildcard
Go to the Framer dashboard. In the domains sections in the left sidebar, select your domain. Navigate to the "Multi Site" tab.
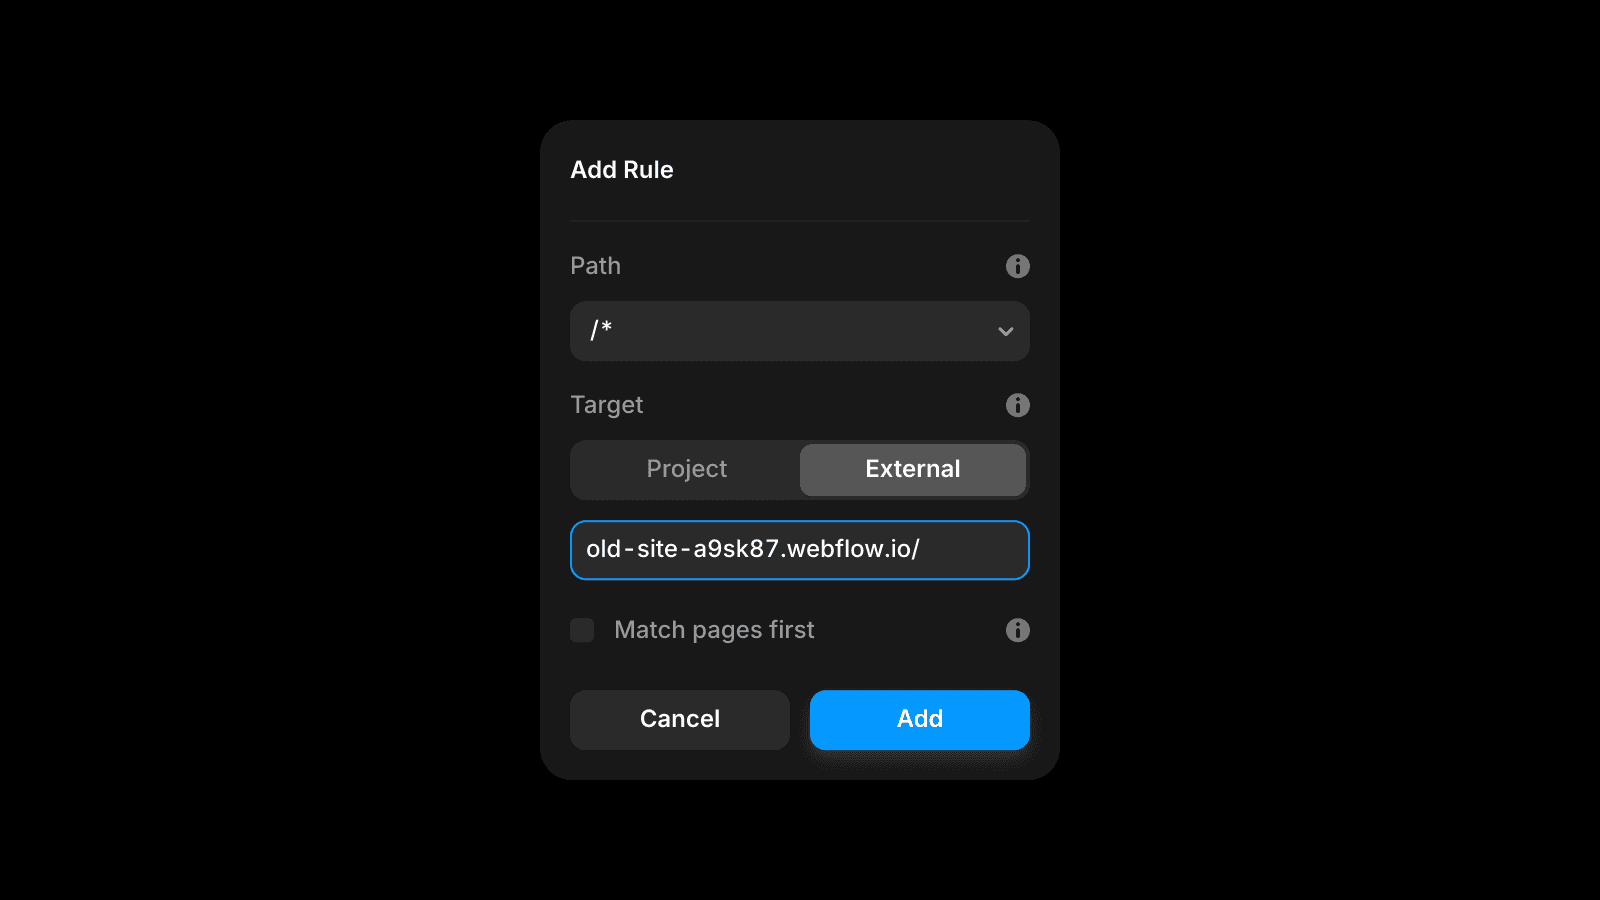
Create a Multi Site rule that routes all traffic to your site old-site-a9sk87.webflow.io. The wildcard (/* for path and :1 in the target URL) applies the rule to all paths on your domain.

Path:
/*Target: External
URL:
old-site-a9sk87.webflow.io/:1Match pages first: checked
"Match pages first" will make Framer serve your project pages first and fallback to your old site. This way you can progressively add pages to your Framer project and Framer replaces the ones on your external site as you publish them. No need for any additional rules.
4. Set Home Page
Create a Multi Site rule that routes your home page to your old-site-a9sk87.webflow.io. Once you designed and published your Home page at Framer you can remove this rule.
Path:
/Target: External
URL:
old-site-a9sk87.webflow.io/Match pages first: not checked
5. Publish your project
Publish you project again. Visit the staging link of your site staging-123.framer.app to make sure everything is working as expected.
6. Set DNS Records
Now that everything works well on the staging URL you can make the changes on your domain registrars side to point the domain to Framer. Make sure the necessary DNS records are set on your main domain. Learn more about DNS records.
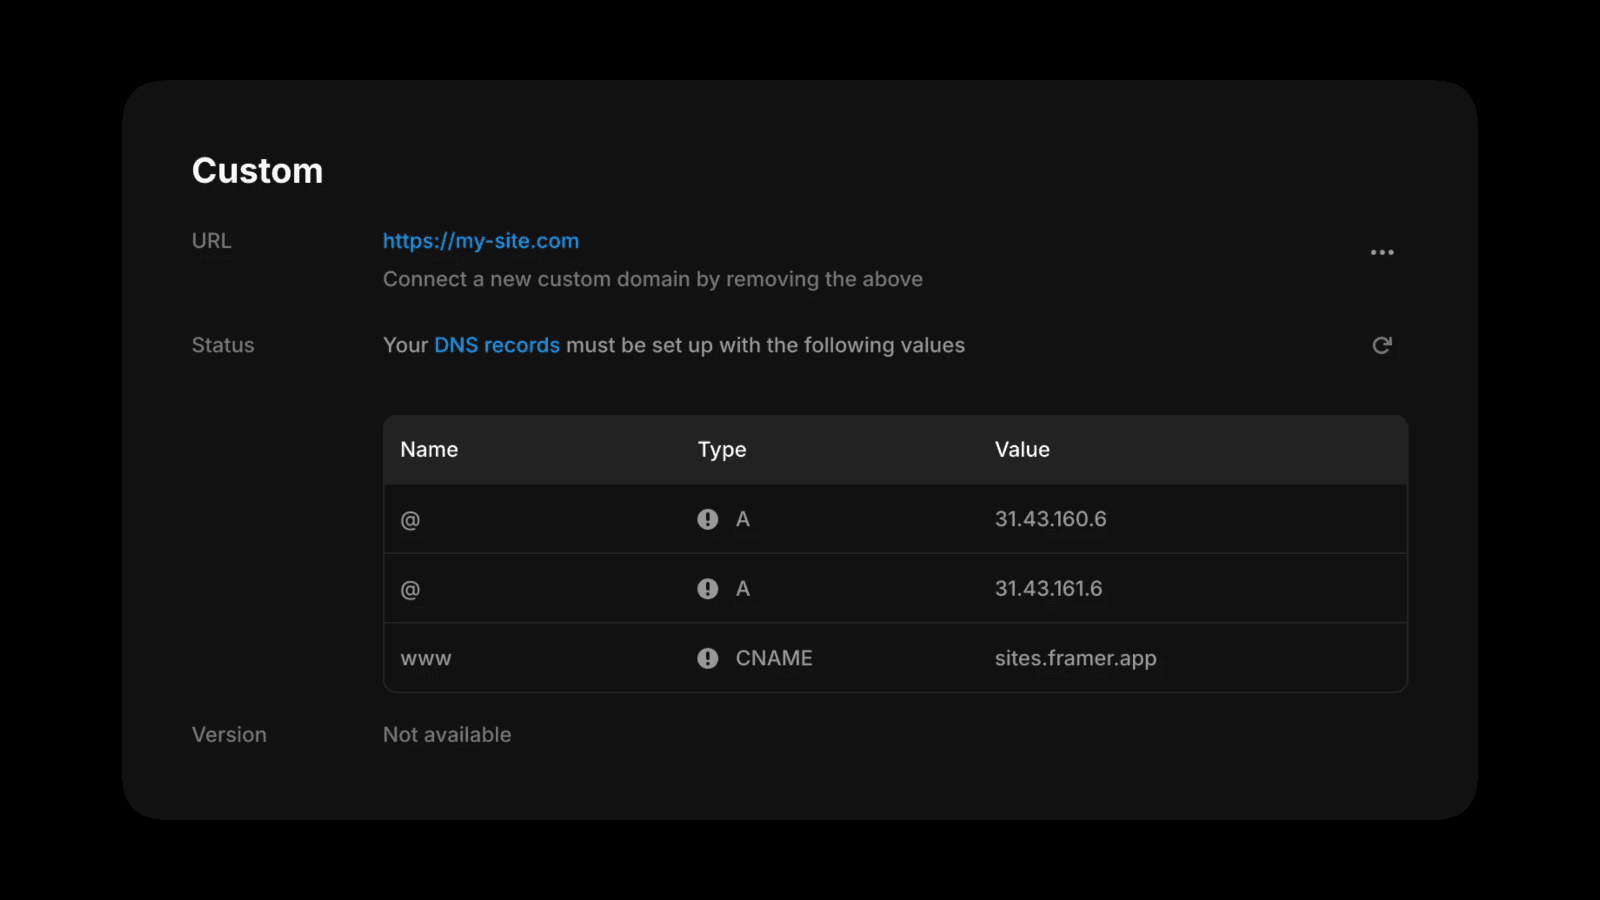
Wait a few minutes for the DNS to propagate (you can check if this has completed using a tool like DNS Checker). Visit your site at my-site.com to make sure everything is working as expected.
7. Create Pages
Design your pages and publish them as they are ready. Because we set the option "Match pages first" they will instantly replace the ones on your old site. Make sure the page paths (page names) match the ones of your former site.
8. Remove Multi Site Rule
Once all the pages have been moved to Framer, you can remove the first Multi Site rule you created (the one with the /* path).
Updated