How to publish a plugin
Learn how to publish a plugin in the Framer Community and start earning from your work
Share your plugin with the Framer Community to reach a global audience of users. You keep 100% of your plugin revenue and gain visibility through the Community.
Before you publish
Make sure your plugin is ready before publishing. Plugins are published immediately, so it’s important to review everything carefully.
Test your plugin in a fresh Framer project.
Fix any bugs, compatibility issues, or unexpected behavior.
Prepare your plugin as a
.zipfile.Create high-quality screenshots that clearly show your plugin in action.
Review the byline, description, categories, and pricing information.
If you’d like, you can also review our plugin best practices to make sure your plugin is polished and ready for publication.
Publish your plugin
Once your plugin is ready, you can publish it in the Framer Community.
Open the Marketplace section in the Framer Community.
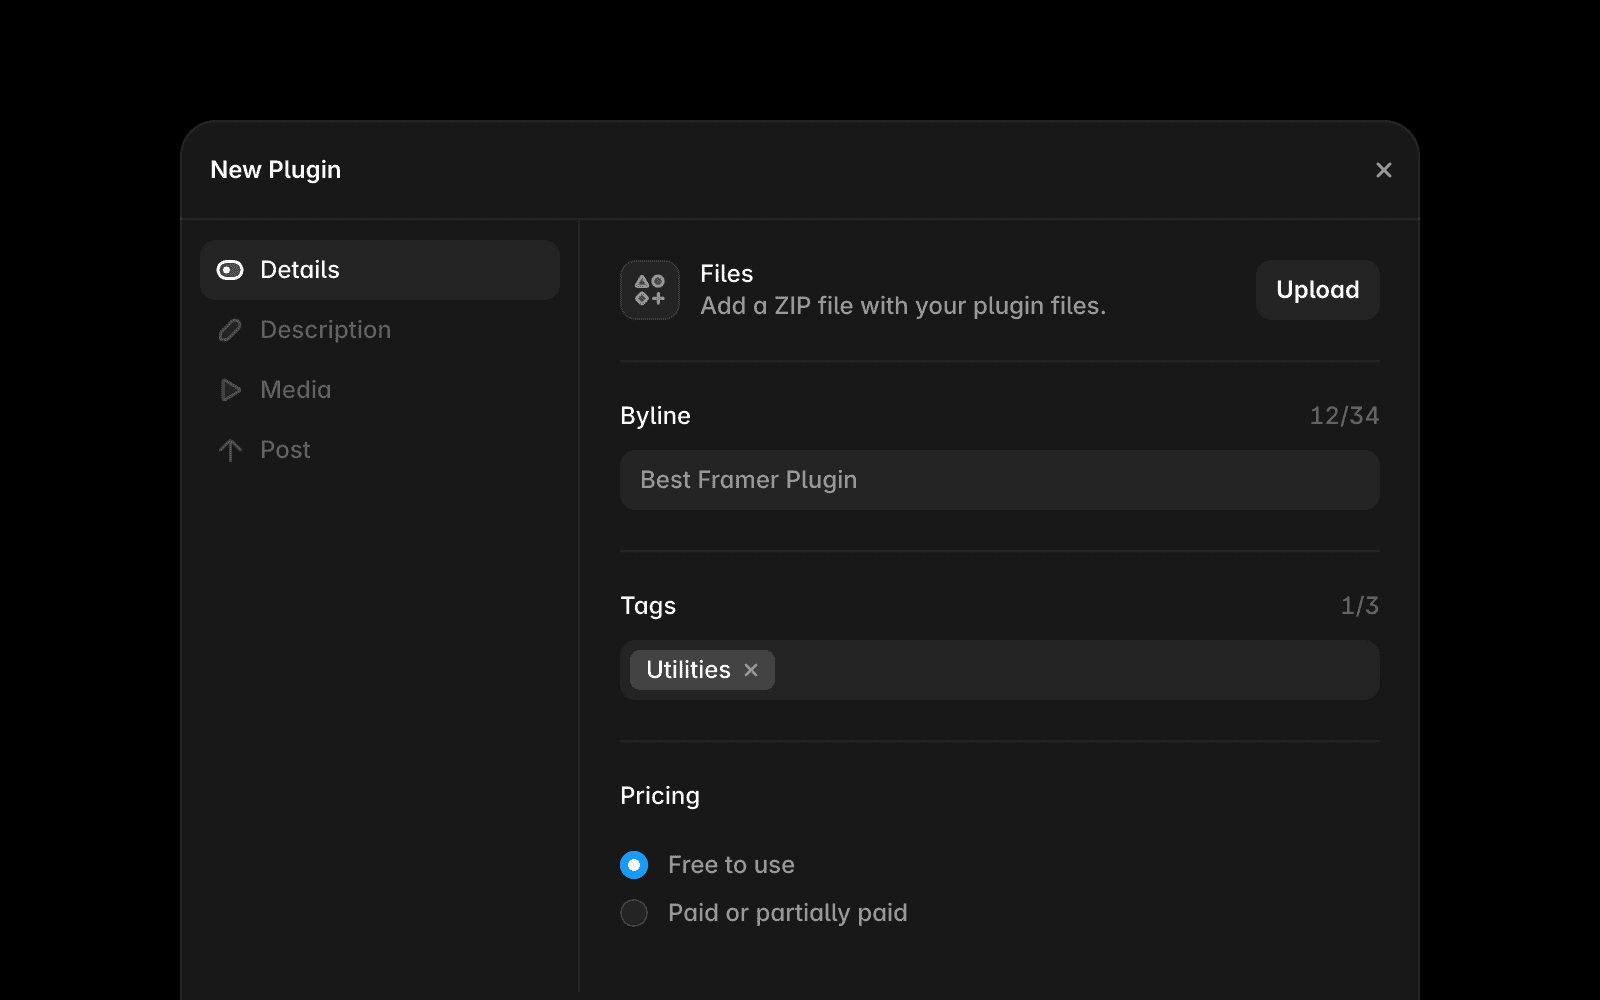
Click Post in the top toolbar, then select Plugin.
Fill in the required fields:
Plugin file (
.zip)Byline and description
Images and tags
Pricing information, if your plugin includes paid features
Optionally create a post for the Community feed.
Click Submit.
Your plugin is published immediately and becomes available in the Community.
Publish a new version
After publishing your plugin, you can release updates at any time by publishing a new version.
To publish a new version:
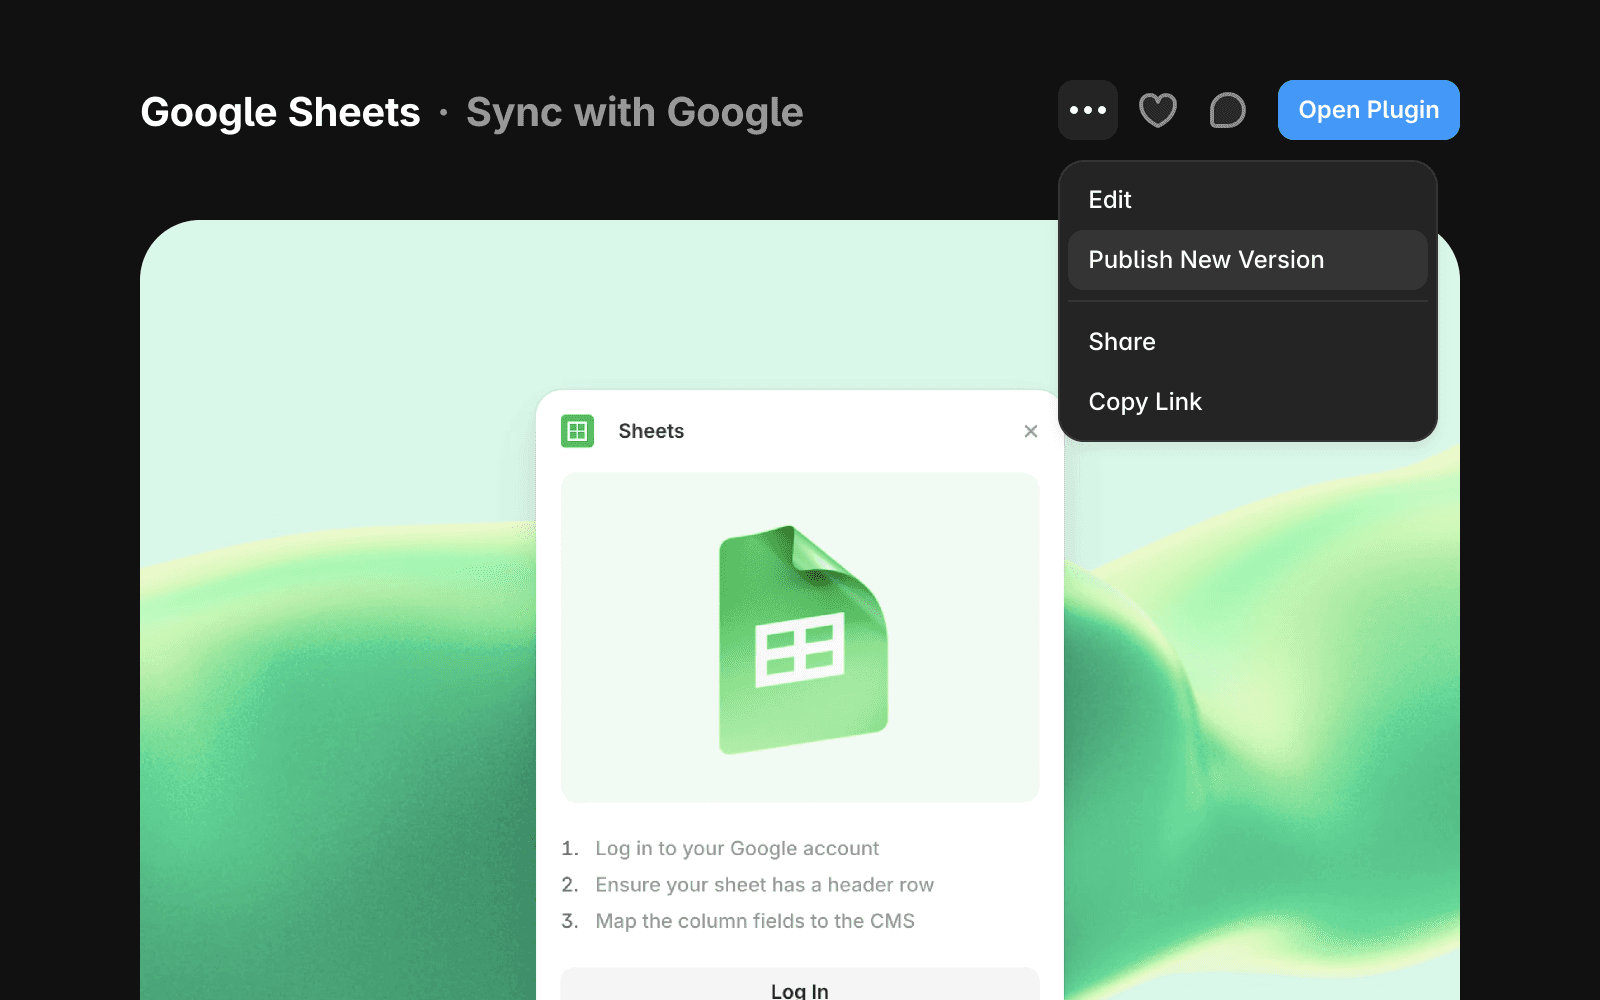
Open your component page in the Community.
Click the three-dot menu.
Select Publish New Version.
Upload the new
.zipfile and add a brief list of the changes included in this version.Click Publish.
Note: If you see the error message “This plugin version already exists”, the uploaded .zip file is identical to a previously published version. Run npm run pack to generate a new plugin package, then upload the newly generated .zip file.
After you publish
After publishing, you can:
Upload new versions of your plugin.
Edit the description, images, pricing details, and other information.
Reach new users through the Marketplace and the Community feed.
You keep 100% of any revenue generated by your plugin.
Make your plugin stand out
A few simple improvements can help more people discover your plugin:
Write a clear and descriptive byline.
Use screenshots that demonstrate the plugin's functionality.
Clearly explain any paid features or upgrade options.
Choose categories that accurately match your plugin.
Share a post in the Community feed to increase visibility.
If you have questions about publishing plugins, contact the Framer team at creators@framer.com.
FAQ
Do I need approval before my plugin is published?
No. Plugins are published immediately after you submit them. There is no review process or waiting period.
What file format should I upload?
Plugins must be uploaded as a
.zipfile.Can I update my plugin after publishing?
Yes. You can upload new versions and edit your plugin details at any time.
Updated
